[postlink]http://testlifepsd.blogspot.com/2010/03/3d-textured-text-effect.html[/postlink]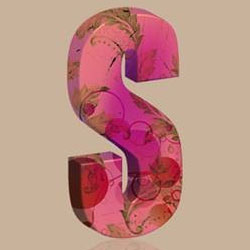 In this tutorial, I will show you how you can make a stylized 3D textured text effect using various textures to give it a unique look with Illustrator & Photoshop. I will be giving you the step by step instructions along with the links to the resources & stuffs used.
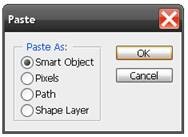 Power Tip: If for any reason, you want to edit the pasted 3D Smart Object, just double click on the Vector Smart Object thumbnail in the Layer Palette, press OK on the resulting window, the Smart Object will automatically open up in Illustrator, do the changes or editing you want, then go to File>Save & close the file & tadaa the changes will reflect in your Photoshop file.
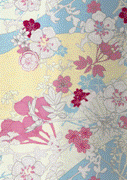 Now, lets begin with the Photoshop magic, we will be adding various texture on the different layers & will spice them up with the variety of blending modes, the key is to experiment & choose the settings that will best suit your purpose.Open the texture image that you would like to use, for the first layer I used a texture, lets call it Texture 1 from a texture pack on deviantArt. Go to Select>All & then Edit>Copy to copy the entire texture image, Now we are going to paste this image into our letter, but you have to tell Photoshop where to paste it. So return to your 3D text document & pressing down Ctrl/Cmd Click on Vector Smart Object thumbnail, this will select the entire text/letter, in our case, the letter “C”, now go to Edit>Paste Into (Shift+Ctrl/Cmd+V) to paste the texture image on “C”. Change the blending mode of the texture layer to Overlay.
Now, your image & layer palette should look like so:
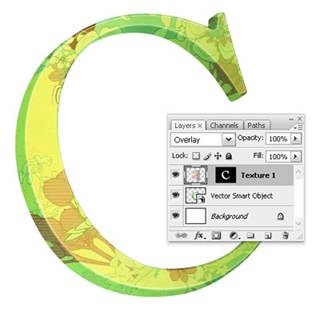 Look at your layers palette now. You see your texture image there and a mask has been made that allows only the letter part of the image to show.
If you’re using different images, play around a bit with blending modes, mostly Overlay, Soft Light, Hard light, Multiply will give the desired results.
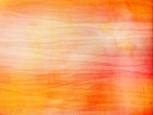 In brief, open the texture image, Select All (Ctrl/Cmd+A), Copy it (Ctrl/Cmd+C) & return to your original document, pressing down Ctrl/Cmd Click on Vector Smart Object thumbnail to select the letter/text & go to Edit>Paste Into (Shift+Ctrl/Cmd+V) to paste the texture in the letter “C”. And, change the blending mode to Multiply.

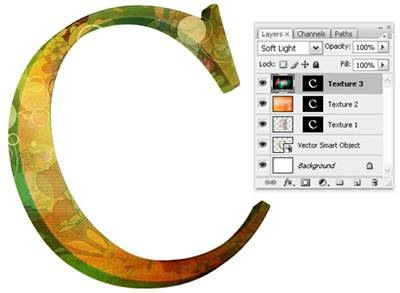 This is how my image & Layer Palette looks like after step 6.
Power Tip: If you need to edit the filler texture image or if you don't like how it looks within the letter, you can still change it! Just choose the Move Tool (V) & drag over with your texture layer selected. Also, if you need to resize the texture image select Edit>Transform to resize it.
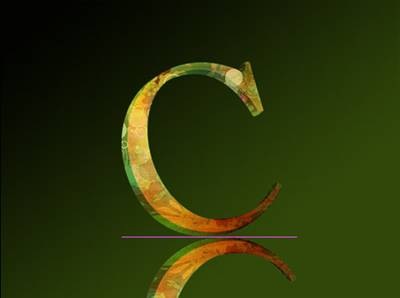
 Now pick the Gradient Tool (G) and draw a gradient (black to white) in the direction from bottom to mid top.
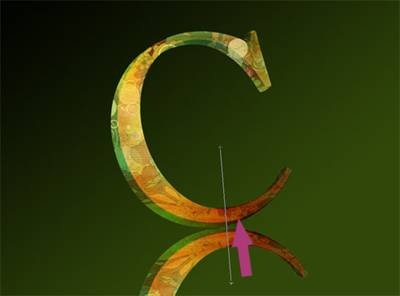 Finally just reduce the opacity of the duplicate layer and you are all done. I reduced the opacity to 20% , there is no golden rule about the opacity % , just play with the opacity setting & choose the one that suits your image.
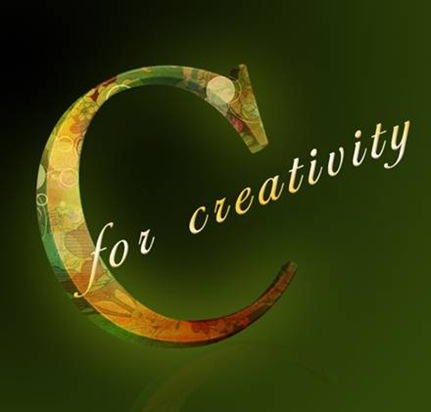
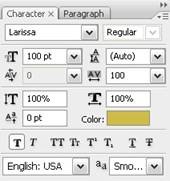 The font used is Larissa & can be downloaded from here. I also rotated the words a bit via Edit>Transform.
Then I applied the layer style, as shown in the screenshots below.
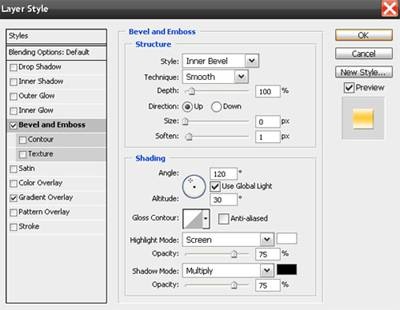
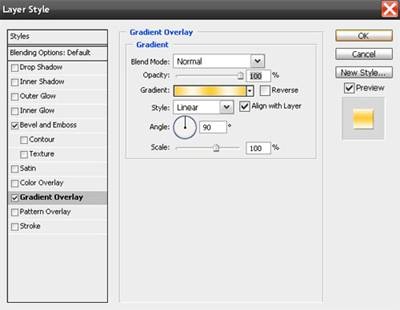
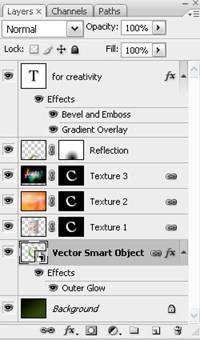
 And, that’s how my Layers palette in end & final image looks like.
 Here, is a another example of image, I made with the same technique.
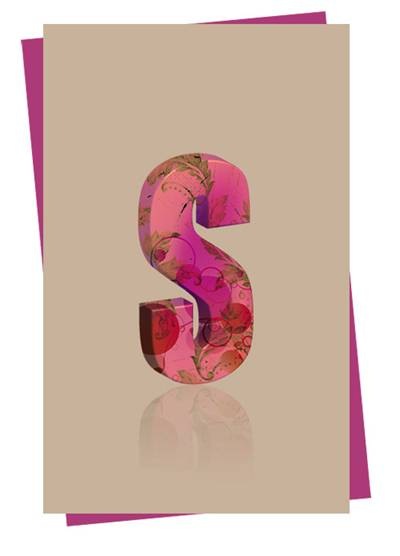 To take it further, play & experiment with various textures, the blending modes, also changing the various Adjustments options like Invert, Posterize, Hue/Saturations settings etc. gives the different results. You can also make the text look grungy or rusty using grunge textures, its just the matter of exploring the powers of Photoshop & tapping your creativity!
 In this tutorial, I will show you how you can make a stylized 3D textured text effect using various textures to give it a unique look with Illustrator & Photoshop. I will be giving you the step by step instructions along with the links to the resources & stuffs used.
 Preview of Final Results

3D Textured Text Photoshop Tutorial
Step 1
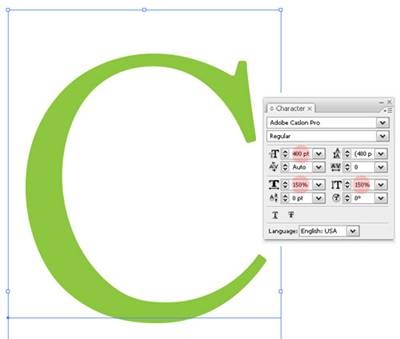
Open up Illustrator, and with the Type Tool type a letter or text, I typed the letter “C” I used the font Adobe Caslon Pro, you can use any font that you like, just make sure that it is a bit thick font to yield better results. I set the font size to 400 pt & scaled it horizontally & vertically to 150% through the Character Palette, though don't worry about the font size too much because we'll be pasting it as Smart Objects in Photoshop so we can adjust the size at any given time. The color I used for the letter is #8CC63F.
Step 2
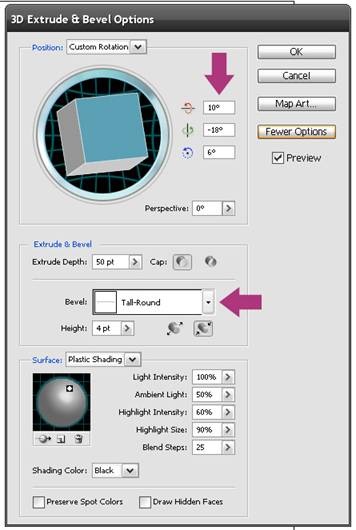
Now go to Effect>3D>Extrude & Bevel, make sure that Preview is on. Use the settings shown below, apart from specifying rotations for x, y & z axis, I chose Tall-Round from the Bevel drop down list. The settings will more or less depend on the font, so if you have used a different font play a bit, though I will advise to stay away from the fancier Bevel settings, mostly None setting works best. You can also make it more thick by increasing the Extrude Depth.
Step 3
After you’re happy with your 3D effect, it will be time to move on over to Photoshop. Open a new document in Photoshop. Now, copy your 3D text/letter from Illustrator & paste it as Smart Object in Photoshop, press Enter key or checkmark to commit. You can now resize your text to whatever size you want, in fact, bigger the better, but for the purposes of this tutorial, I will stick to a small canvas.
Step 4
 Now, lets begin with the Photoshop magic, we will be adding various texture on the different layers & will spice them up with the variety of blending modes, the key is to experiment & choose the settings that will best suit your purpose.
Now, your image & layer palette should look like so:

If you’re using different images, play around a bit with blending modes, mostly Overlay, Soft Light, Hard light, Multiply will give the desired results.
Step 5
Repeat the procedure prescribed in Step 4, but with a different texture. I used one of the texture from this pack.

Step 6
Now, its again time to do the same thing as mentioned in Step 4 & 5, but with the different texture image. This time I used a more colorful texture from a another texture pack over at deviantArt. And, this time I choose the blending mode to Soft Light.
Power Tip: If you need to edit the filler texture image or if you don't like how it looks within the letter, you can still change it! Just choose the Move Tool (V) & drag over with your texture layer selected. Also, if you need to resize the texture image select Edit>Transform to resize it.
Step 7
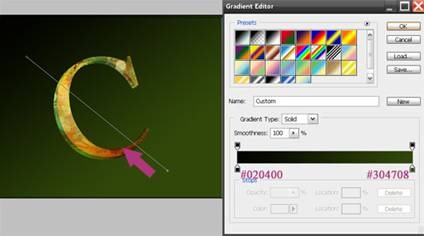
Now, select the Background layer & fill with a Gradient Tool (G). I used Linear Gradient & the colors for the two stops are as prescribed in the screenshot. Drag the gradient tool diagonally from bottom to top.
Step 8
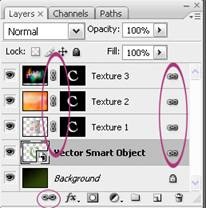
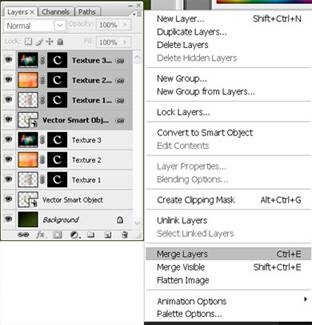
Pressing down Shift key select all the layers in the Layer Palette except the background layer & Link all of them. Also make sure to link the Layer Mask thumbnails with their corresponding layer thumbnails by clicking once between them.
Step 9
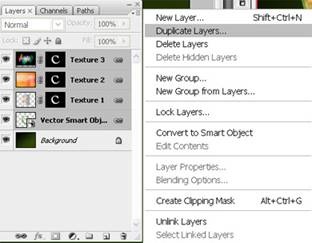
Now, we will do the reflection of our letter “C”. For that, select all the linked layers & duplicate them.
Step10
Merge all the duplicated layers & name it Reflection.
Step 11
On the Reflection layer, go to Edit>Transform>Flip Vertical & place it beneath the letter “C”. Adjust its perspective if the need be.
Step 12
The next step is to add a layer mask to the duplicate layer. To do this simply click on the add layer mask button in the layers palette.
Step 13
Finally, with the Type Tool, I wrote the words “for creativity” with the settings as shown in the Character Palette.
Then I applied the layer style, as shown in the screenshots below.


Step 14
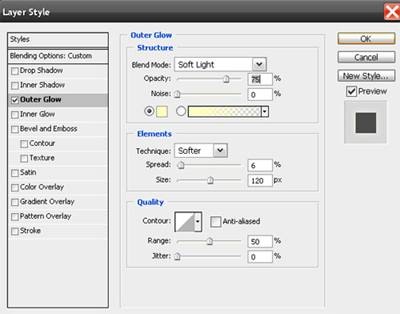
To add a bit of finishing touch, I added Outer Glow to the Vector Smart Object layer, as shown.


source: photoshoptutorials.ws
0 comments:
Post a Comment