0
[postlink]http://testlifepsd.blogspot.com/2010/02/floating-clothes.html[/postlink]Fun way to learn the Clone Stamp tool (as well as adding a virtual drop shadow) is to create an invisible man or woman. We can transform an ordinary portrait or action shot to make the person disappear, leaving floating clothes around a space. Adding shadowed wrinkles also adds realism.
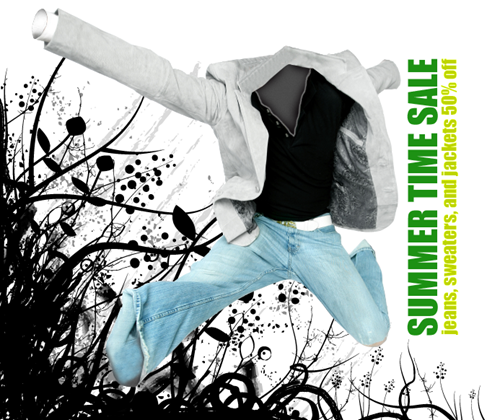


Preview of Final Results

Floating Clothes Photoshop Tutorial

Floating Clothes Photoshop Tutorial

Step 1

Open a photo of a person, preferably one that includes the entire body. Choose one with a simple background that can either be cut out or cloned for a more realistic look. For each step, work on a separate layer to reduce the risk of having to start over.
image
CREDIT: ©ISTOCKPHOTO/TYLER STALMAN
Step 2

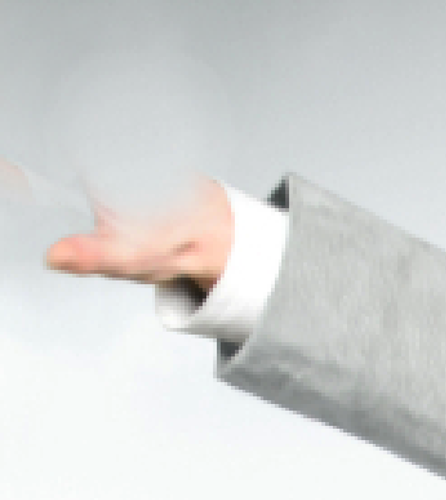
Zoom in to the areas of the person where their skin is showing (Hold down the Cmd and then press + or - (PC: Hold down the Ctrl and then press + or -)). Select the Clone Stamp tool and use it to erase the areas not too close to the clothing. To do this, hold down Option (PC: Alt) and click an area to clone, then release the key and click-and-drag over the area to paint, replacing the pixels with the source pixels. If you have a completely solid background, just select the areas with a Selection tool and press Delete (MAC: Backspace).
image

Step 3

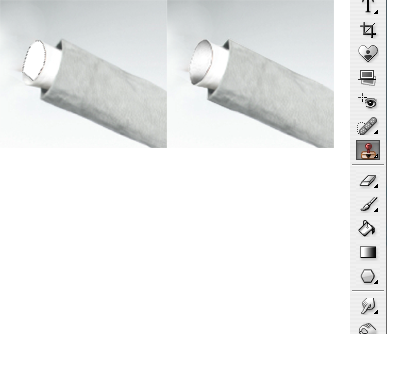
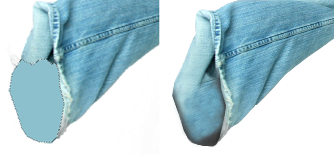
Once the pixels behind the hands, feet and head that would normally be the background are replaced using the Clone Stamp tool or the Selection tool, we need to redraw what the inside of the clothes would look like. Using a Selection tool, draw around each area and fill it using the Paint Bucket tool. Rarely does a solid color look real, so add shadows by keeping the area selected and using a large, soft brush with the Brush tool, click-and-drag around the edges to create shadows for depth.
image

Step 4

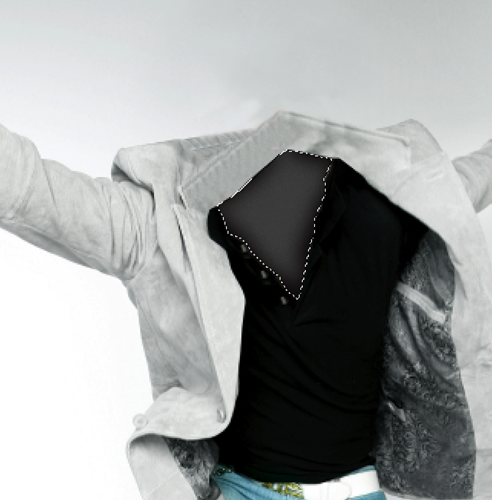
For the areas that need deeper shadows, first start by filling the area on a separate layer as usual with a solid color, perhaps taken using the Eyedropper tool from nearby areas. Then, add some noise to this layer, at a very low setting such as 1 (Filter>Noise>Add Noise). This adds to the realism and makes it less sterile looking. Then using the Clone Stamp tool, Alt-click (MAC: Option-click) in a nearby source area and then release and click-and-drag in the new area to create the correct look. Use the same technique as earlier to create shadows on some of the edges (use a large, soft brush on the edges of the selection).
image

Step 5

Use the Clone Stamp tool again to extend any areas of clothing that would naturally move that way. For this example, I used the Clone Stamp tool to extend the collar to meet in the back.
image

Step 6

The clothing opening that face the front would have a different shadow than the pant legs and sleeves. Instead of having a shadow on the bottom or on the sides, the shadow would be along a large portion of it to show depth. You can optionally add some noise to make it more realistic. Here I added a shadow while the area was selected by using the same technique (painting with a large, soft brush) to give the sweater some depth. The illusion is that the sweater is still filled out but empty.
image
CREDIT: ©ISTOCKPHOTO/john rawsterne (DECORATION)

Final Results

Floating Clothes Photoshop Tutorial


source: photoshoptutorials.ws

Floating Clothes

0
[postlink]http://testlifepsd.blogspot.com/2010/02/scrapbook-cover.html[/postlink]Learn how to use the tools of Photoshop to create a scrapbook cover. In this beginner Photoshop tutorial, you will learn how to draw scrapbook elements such as tapes and thumbtacks.


Scrapbook Cover Photoshop Tutorial

Step 1: The Background

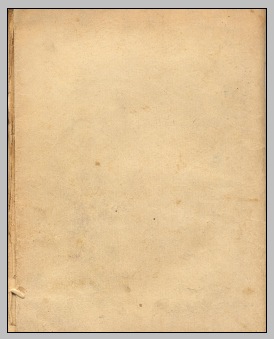
Open a wallpaper or image that resembles a book or report cover. Make sure to choose one that will look good with text and images stuck on to it.

1

Step 2: Creating a Title

Type out a title, make it a big text size, I used 60pt. The font I used was Pristina. Now create a new layer called ‘background’ and in the layer panel move it below the text layer you just created. Change your foreground colour to a colour that contrasts the title’s colour. I used #d9d3c1. Using the Rectangular Selection Tool create a selection that fits behind the title. Now right click inside the selection and click Fill. Select ‘Foreground Color’, then Ok. Give this layer about a 75% opacity. It should now look something like this:
5

Step 3: Creating the Tape

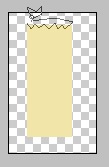
Create a new layer called ‘tape’. Change your foreground colour to #f1e5a9, you may have to tweak it to look good with your background. Using the rectangular selection tool make a long rectangle shape. Right click in the rectangle selection and click Fill. Select ‘Foreground Color’ and then Ok. Now make cuts into the top and bottom of the rectangle using the Polygonal Lasso tool. To finish it off give the layer 60% opacity. It should now look some what like a piece of tape.
7

Step 4: Mount the Title using the Tape

Rotate, move, and resize the ‘tape’ layer until it looks like it is holding the left side of the title up. Duplicate the ‘tape’ layer and do the same process but so the tape is holding up the right side.
6

Step 5: Creating the Thumbtack

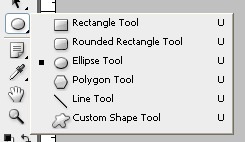
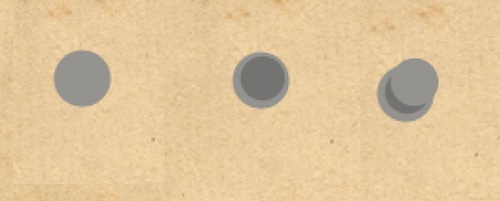
Now we are going to create a thumbtack. Select a foreground colour for the colour of the thumbtack. I used #94938f. Now create a small circle using the Ellipse Tool.
10
Now make another smaller darker coloured circle and move it to the upper right corner of the first circle. Next make circle a bit bigger than the previous one and the same colour as the first one. Move this circle so it is overlapping the previous circle.
2
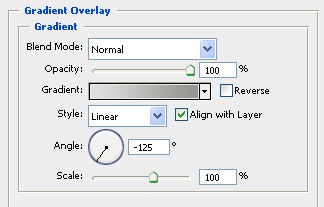
Change the foreground colour to #e1e1e0 and the background colour to #94938f. Now bring up the layer effects window for this layer (The last circle you created). Go down to ‘Gradient Overlay’ and input the following settings.
8
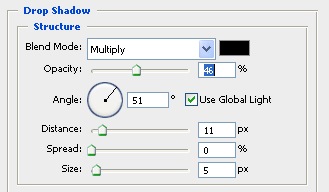
Once you are happy with the shape and colours of the thumbtack layers merge the layers and call the layer ‘thumbtack’. Next bring up the layer effects window for this ‘thumbtack’ layer and apply a drop shadow with these settings.
9
Step 6 – Creating the Peeling Image
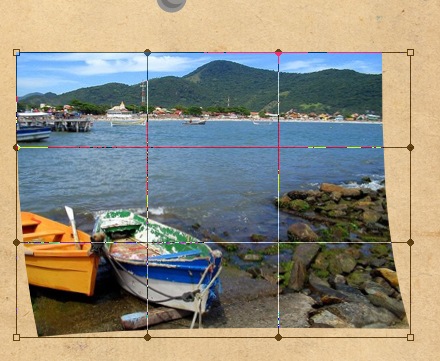
Open an image that you would like to be pinned to the book. Name this layer ‘photo’. Now to add some depth to this image, warp it so it looks like it is bending off the page. Edit > Transform > Warp. Pull the bottom corners out a bit
3

Step 7: Adding the Drop Shadow

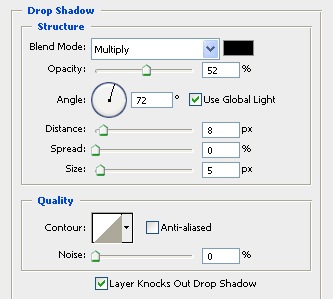
Go to the layer effects window and add a drop shadow to the ‘photo’ layer. Adjust it until you think it looks good, I used these settings.
4
Make sure this ‘photo’ layer is below the ‘thumbtack’ group. Now drag the thumbtack overtop, it should now look as if the thumbtack was holding the image on.

Final Result

With my final result I tweak the colors in the ‘photo’ layer to bring out more of the orange in the picture. Image > Adjustments > Color Balance. This effect may not apply to your image.
final

source: photoshoptutorials.ws

Scrapbook Cover

0
[postlink]http://testlifepsd.blogspot.com/2010/02/foreground-lighting.html[/postlink]Improve your portraits with this easy and effective foreground lighting effect. In this Photoshop tutorial, you will learn how to dim the background to add focus to the subject. This effect may sound simple, but it does an exceptional job fixing portraits with busy backgrounds.


Foreground Lighting Photoshop Tutorial

Step 1: Open a portrait photo

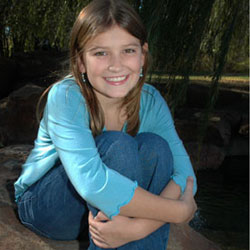
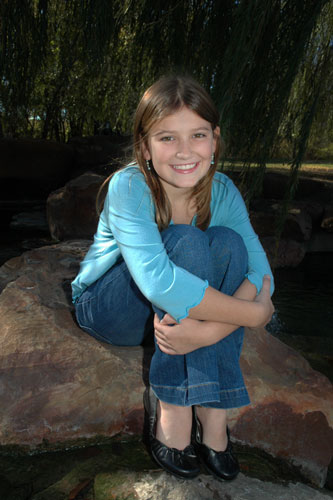
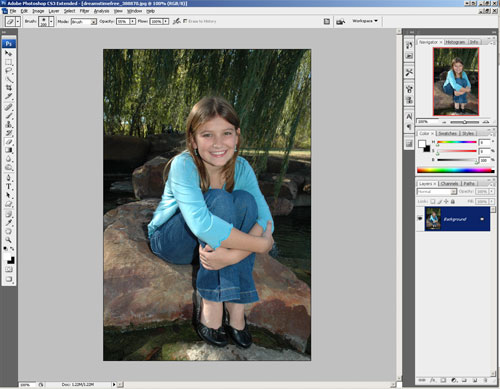
First, open an image of a portrait with a busy background that you would like to apply this effect to. This effect will make the background darker to add focus to the subject.
undefined

Step 2: Add an adjustment layer

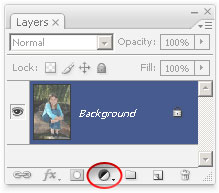
Now we'll need to add an adjustment layer that will make the image darker. In the Layers palette, click on the New Adjustment Layer button.
undefined
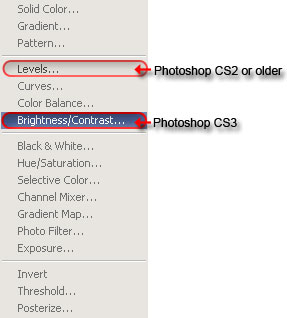
There are many ways to darken the image, but the simplist methods are shown below. We don't recommend using the Brightness/Contrast tool in Photoshop CS2 or older because they produce poor results. The Brightness/Contrast tool has been greatly improved in Photoshop CS3, but if you're an experienced Photoshop user and you want more control, we recommend using the Levels or Curves tool instead.
undefined
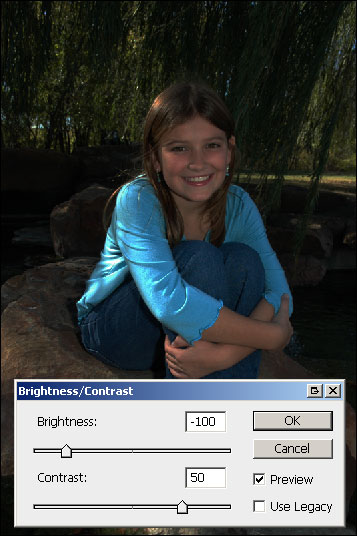
If you picked the Brightness/Contrast adjustment layer, simply reduce the brightness and increase the contrast. As you adjust the settings, focus on the background instead of the subject because this effect will only be used to darken the background.
undefined
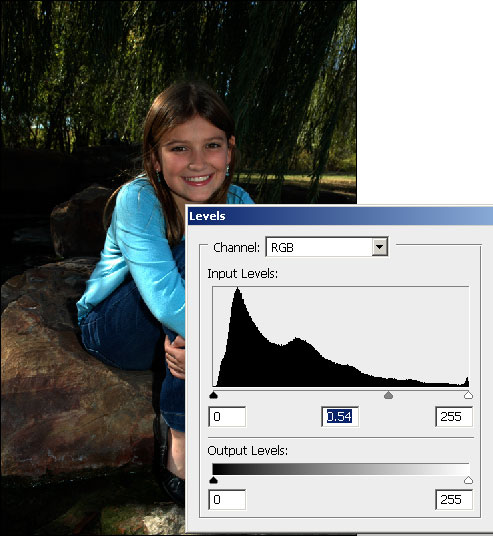
If you picked the Levels adjustment layer instead of the Brightness/Contrast adjustment layer, start by moving the middle input slider towards the right. You may play around with the other input sliders and adjust the output levels to get the effect that you like. Remember to focus on the background instead of the foreground because this layer will only be used to darken the background.


undefined

Step 3: Mask the adjustment layer

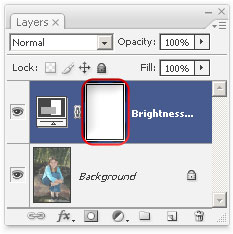
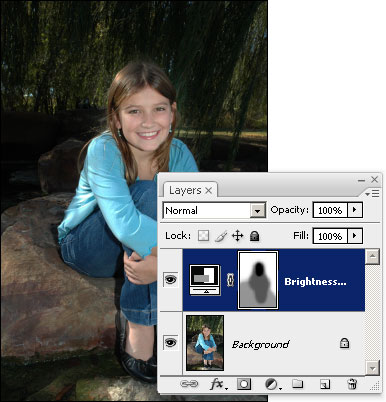
The adjustment layer darkened the entire image. Now we have to mask out the areas that we don't want to be darkened - the subject/person. In the Layers palette, you should now see a new adjustment layer with a layer mask. Make sure that the layer mask is selected by clicking on the layer mask thumbnail. It should have a white border to indicated that it is activated.
undefined
Now select the Eraser tool from the toolbar. Also, make sure that your foreground and background colors are set to the default. Simply press the D key on your keyboard to reset the foreground and background colors to the default colors.
undefined
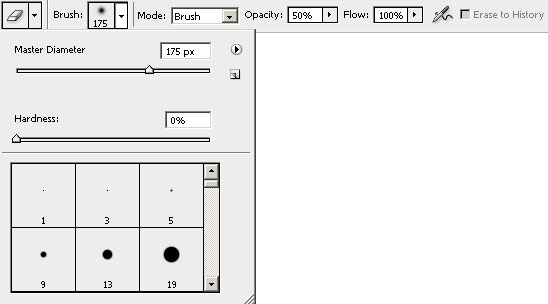
Once you have the Eraser tool selected, the option bar near the top will show you the settings you can set for the Eraser tool. Set the Opacity to 50% and adjust the brush size and hardness.
undefined
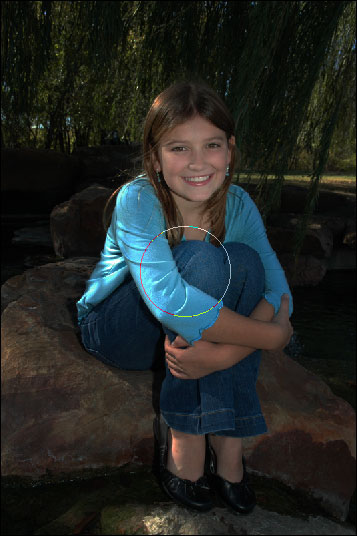
Using the Eraser tool, erase the foreground to make it brighter. If you make a mistake, you can switch back to the brush tool to paint back the areas that you want to reverse.
undefined
Here's what my image looks like after erasing the foreground.
undefined
Erase the foreground or just the subject again. This time, I ony erased the subject to keep the rock a little darker.
undefined
In the option bar, set the Opacity of the brush to 100%.
undefined
We'll apply one more layer of erasing to the layer mask. This time, I only erased the face. In the image below, you can see the areas that I erased. If you look closely, you can see a halo around the subjects head. This is because I was being sloppy and my brush hardness was too soft. I can fix this by switching back to the brush tool and using a stronger hardness (50%) to paint back the background.
undefined

Final Results

undefined
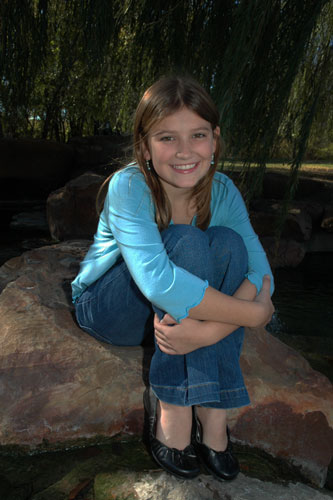
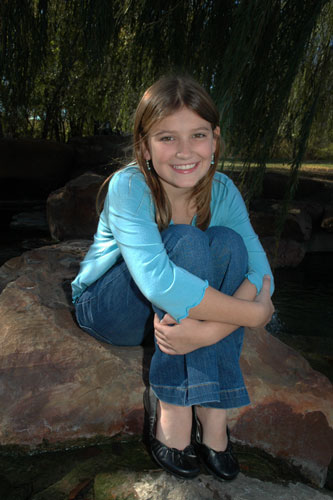
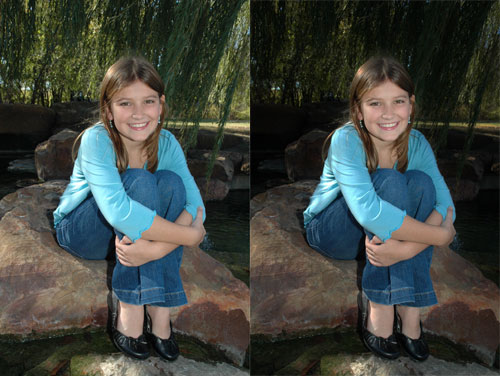
Dimming the background is a simple, but truely effective way to hide busy backgrounds and increase focus to the subject.
Left to right: Before and after


source: photoshoptutorials.ws

Foreground Lighting

0
[postlink]http://testlifepsd.blogspot.com/2010/02/trendy-neutral-photo-effect.html[/postlink]Make your photos interesting with this popular effect created from a combination of three photo effects. In this Photoshop tutorial, you'll learn how to create common photo effects that can be combined to simulate the trendy effect many photographers use on their photos.


Preview of Final Results

Trendy Neutral Photo Effect Photoshop Tutorial

Trendy Neutral Photo Effect Photoshop Tutorial

Step 1: Open an image into Photoshop

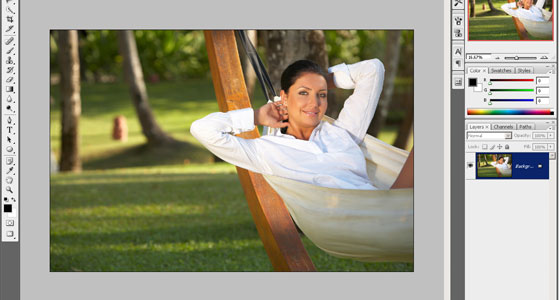
Open a photo into Photoshop. This photo should not have any strong photo effect applied.
Image

Step 2: Add a neutral color effect

First, we'll add a neutral color effect. To do this, we'll need to create a new layer with a grayscale version of the image as the layers content. Instead of duplicating the layer and desaturating it, we'll be using adjustment layers instead. Adjustment layers are non-destructive, editable anytime, and they keep the Photoshop file size small.
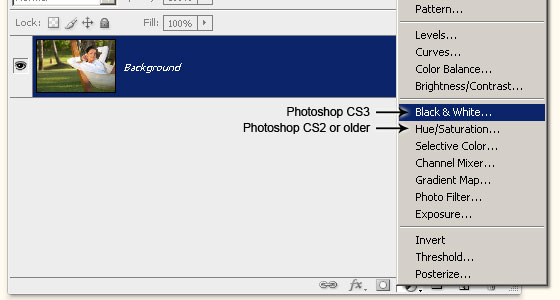
In the Layers palette, click on the new adjustment layer button and choose Black & White. The Black and White option is only available in Photoshop CS3. If you are using Photoshop CS2 or older, choose Hue/Saturation instead.
Image
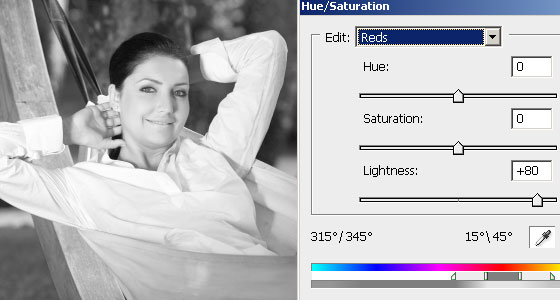
In the Black and White tool, adjust the settings to get the desired black and white effect you like. If you're using Photoshop CS2 or older and chose the Hue/Saturation tool instead, you can create a black and white image with the exact same options and results as the Black and White tool. Simply choose the color that you would like to edit and adjust the lightness. For example, if you want the reds to be brighter, choose "Reds" from the edit drop down menu and increase the lightness.
Image
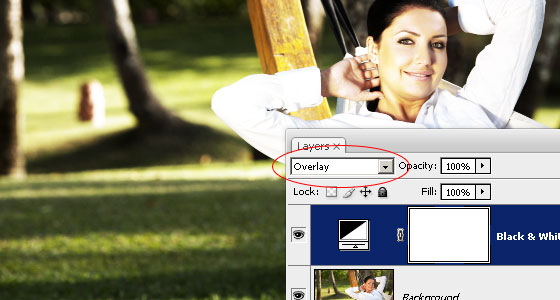
Change the blending mode of the new adjustment layer to Overlay. If you don't like the results, double-click on the layer icon to edit the settings again.
Image


Step 3: Add a grain texture

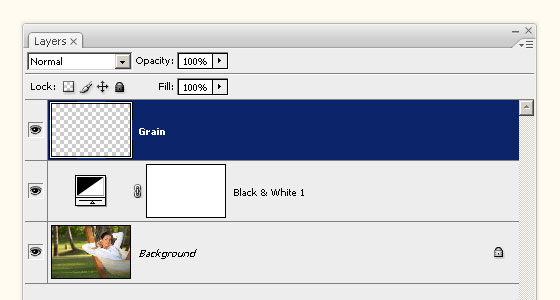
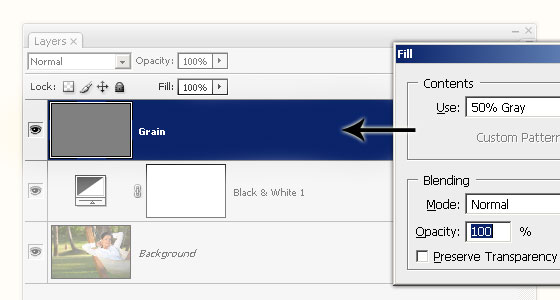
Now we're going to add a little artistic grain to the image. This is optional; you may skip this part if you don't want to add any grain to your image. First, create a new layer and name this layer "Grain".
Image
With the Grain layer selected, press Ctrl+F5 or choose Edit > Fill. In the Fill options, set the contents to 50% Gray and click OK. This will fill the layer with a 50% gray. We're using 50% gray as the base color because it appears transparent when used with certain blending modes.
Image
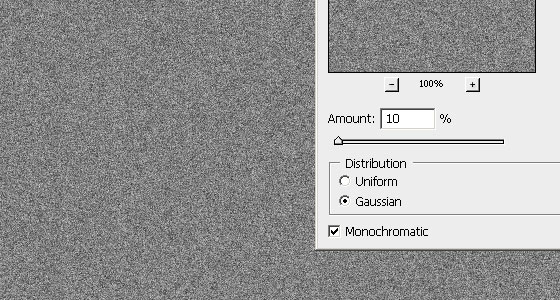
Now we'll add some noise. Choose Filter > Noise > Add Noise. Use the settings below.
Image
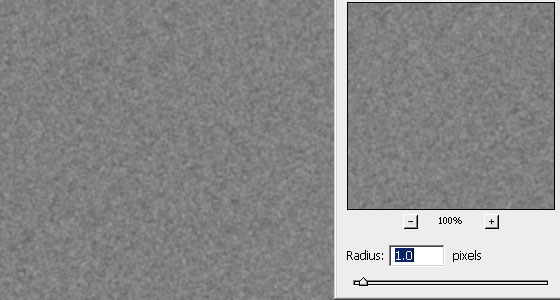
The noise looks too sharp so we'll add a slight blur. Choose Filter > Blur > Gaussian Blur and use the settings below.
Image
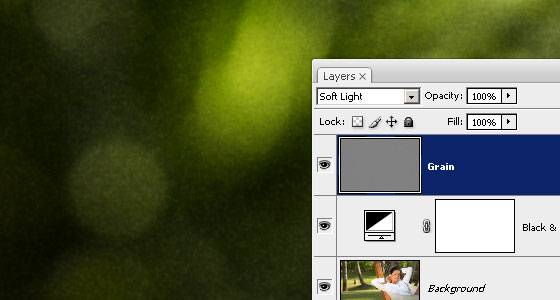
Change the blending mode of the Grain layer to Soft Light.
Image

Step 4: Create an organic vignette

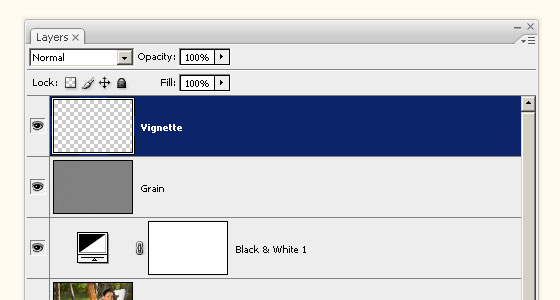
Finally, we'll add the last layer. This layer will contain a organic vignette that will increase focus to the subject. Begin by creating a new layer. Name this new layer Vignette.
Image
Select the lasso tool from the toolbar and create a round selection around the subject.
Image
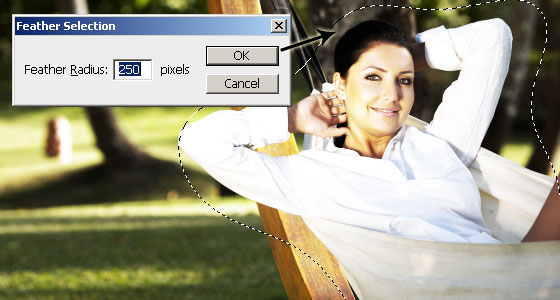
Choose Select > Modify > Feather. This will soften the edge of the selection. Input a radius setting to use. A larger radius will create softer edge. Depending on the dimension of your image, this setting will vary. I used a 250 pixels setting, which is the highest, for a 4992 x 3319 pixels image. If you enter in a radius that is too small or large, press Ctrl+Z to undo and try the Feather Selection tool again. This step may take several tries.
Image
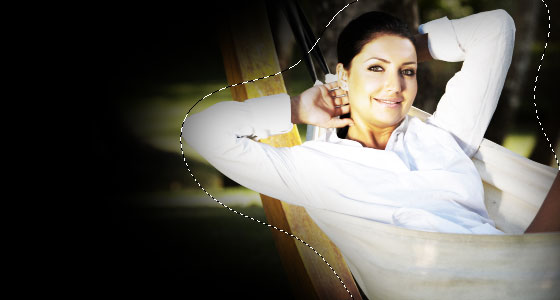
Create an inverse of the selection by pressing Shift+Ctrl+I or choosing Select > Invert. Now fill the selection with black and press Ctrl+D to deselect the selection.Image
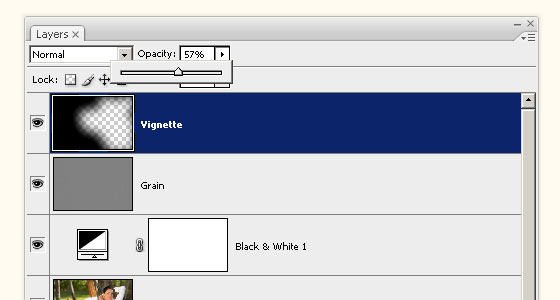
To finish this tutorial, reduce the opacity of the Vignette layer.
Image

Final Results

Trendy Neutral Photo Effect Photoshop Tutorial

Sample PSD

Download this free PSD (Photoshop Document) to view the final results with the layers.
source: photoshoptutorials.ws

Trendy Neutral Photo Effect