[postlink]http://testlifepsd.blogspot.com/2010/03/fashion-shot.html[/postlink]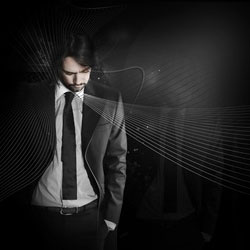 Find out how this amazing image was created with Photoshop. This Photoshop tutorial will teach you many techniques that you can use to enhance your photos.
As with most of my tutorials I try to show as many useful techniques in one tutorial as I can fit in even if the final image isn't something you've been dying to learn how to make. I also try and explain my regular workflow as its probably more useful to know why I want to add something to the picture rather than just telling you to do it, for this reason the tutorial may not be in the most sensible order for example I go foreground, background, foreground, background but I assure you this seemed this most sensible way to tackle this image at the time. Lastly I want to say that I got a lot of my inspiration here from Nik Ainley, a very talented digital artist.
![1[4]](http://photoshoptutorials.ws/images/stories/FashionShot_695/14.jpg)
![2[4]](http://photoshoptutorials.ws/images/stories/FashionShot_695/24.jpg)
![3[4]](http://photoshoptutorials.ws/images/stories/FashionShot_695/34.jpg)
![4[4]](http://photoshoptutorials.ws/images/stories/FashionShot_695/44.jpg)
![5[4]](http://photoshoptutorials.ws/images/stories/FashionShot_695/54.jpg)
![6[4]](http://photoshoptutorials.ws/images/stories/FashionShot_695/64.jpg)
![7[4]](http://photoshoptutorials.ws/images/stories/FashionShot_695/74.jpg)
![8[4]](http://photoshoptutorials.ws/images/stories/FashionShot_695/84.jpg)
![9[4]](http://photoshoptutorials.ws/images/stories/FashionShot_695/94.jpg)
![10[4]](http://photoshoptutorials.ws/images/stories/FashionShot_695/104.jpg)
![11[4]](http://photoshoptutorials.ws/images/stories/FashionShot_695/114.jpg)
![12[4]](http://photoshoptutorials.ws/images/stories/FashionShot_695/124.jpg)
![13[4]](http://photoshoptutorials.ws/images/stories/FashionShot_695/134.jpg)
![14[5]](http://photoshoptutorials.ws/images/stories/FashionShot_695/145.jpg)
![15[4]](http://photoshoptutorials.ws/images/stories/FashionShot_695/154.jpg)
![16[4]](http://photoshoptutorials.ws/images/stories/FashionShot_695/164.jpg)
![17[4]](http://photoshoptutorials.ws/images/stories/FashionShot_695/174.jpg)
![18[4]](http://photoshoptutorials.ws/images/stories/FashionShot_695/184.jpg)
Next select the blend tool (W) and click on the first path then the second, you will now see that a new line has been added between these two but we want more lines. Hit return then use the settings shown below.
![20[4]](http://photoshoptutorials.ws/images/stories/FashionShot_695/204.jpg)
![21[4]](http://photoshoptutorials.ws/images/stories/FashionShot_695/214.jpg)
In this one I made the lines start at the collar and expand outwards, I used a 2px stroke for in Illustrator on these lines. Once in Photoshop I had mask out the part that covered the chin to make it look like it went behind the chin then added the usual blending.
![22[4]](http://photoshoptutorials.ws/images/stories/FashionShot_695/224.jpg) I made these ones with a very thin stroke and tried to make them follow the hair.
I made these ones with a very thin stroke and tried to make them follow the hair.
![24[4]](http://photoshoptutorials.ws/images/stories/FashionShot_695/244.jpg) These ones I made look like they were coming out of his jacket cuff by starting at about his elbow but then in Photoshop using a mask to hide the parts that went over the sleeve.
These ones I made look like they were coming out of his jacket cuff by starting at about his elbow but then in Photoshop using a mask to hide the parts that went over the sleeve.
![25[4]](http://photoshoptutorials.ws/images/stories/FashionShot_695/254.jpg) This last one was a bit different as I made it black, I had to make this go over the light parts of the image in order for it to be visible and also used a mask in Photoshop to give the appearance that it came from under the jacket.
This last one was a bit different as I made it black, I had to make this go over the light parts of the image in order for it to be visible and also used a mask in Photoshop to give the appearance that it came from under the jacket.
![26[4]](http://photoshoptutorials.ws/images/stories/FashionShot_695/264.jpg)
![27[4]](http://photoshoptutorials.ws/images/stories/FashionShot_695/274.jpg)
![28[4]](http://photoshoptutorials.ws/images/stories/FashionShot_695/284.jpg)
![30[4]](http://photoshoptutorials.ws/images/stories/FashionShot_695/304.jpg)
![31[4]](http://photoshoptutorials.ws/images/stories/FashionShot_695/314.jpg)
![32[4]](http://photoshoptutorials.ws/images/stories/FashionShot_695/324.jpg)
![33[4]](http://photoshoptutorials.ws/images/stories/FashionShot_695/334.jpg)
![34[4]](http://photoshoptutorials.ws/images/stories/FashionShot_695/344.jpg)
![35[4]](http://photoshoptutorials.ws/images/stories/FashionShot_695/354.jpg)
![36[4]](http://photoshoptutorials.ws/images/stories/FashionShot_695/364.jpg)

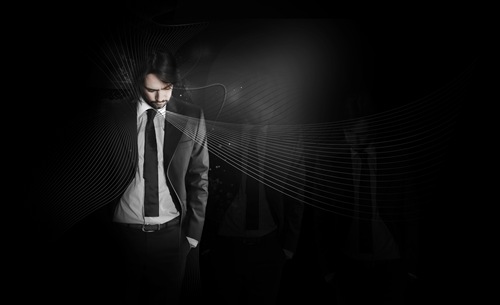
 Find out how this amazing image was created with Photoshop. This Photoshop tutorial will teach you many techniques that you can use to enhance your photos.
 Preview of Final Results

Fashion Shot Photoshop Tutorial
This tutorial will be slightly different from the majority of the tutorials on the web, firstly because it is not aimed at beginners and secondly it will be giving the techniques and why I used them rather than telling you exactly what buttons to press. However I think I've explained most things to a high enough degree to be understood by people with quite a low knowledge of Photoshop but I haven't gone in to details such as how to create a layer etc.As with most of my tutorials I try to show as many useful techniques in one tutorial as I can fit in even if the final image isn't something you've been dying to learn how to make. I also try and explain my regular workflow as its probably more useful to know why I want to add something to the picture rather than just telling you to do it, for this reason the tutorial may not be in the most sensible order for example I go foreground, background, foreground, background but I assure you this seemed this most sensible way to tackle this image at the time. Lastly I want to say that I got a lot of my inspiration here from Nik Ainley, a very talented digital artist.
Step 1
Start by creating a new document in Photoshop, I used a size of 2554x1559px, I can't remember now why I used that size so feel free to use a different ratio if you are creating a wallpaper although try and keep the dimensions similar to what I have. Next select the paint bucket tool and using a foreground color of black, fill the background layer. Next you will need to get a photo of a person, subjects which will work best are one wearing dark clothes as we are going to fade the person into a black background. The techniques shown is this tutorial can always be adapted, for example if your subject is wearing red you could fade them into a red background. The image I used can be found here and probably worth using if you are new to this kind of editing. Okay either drag the image into your document or just copy and paste it then place it similarly to the image shown below.![1[4]](http://photoshoptutorials.ws/images/stories/FashionShot_695/14.jpg)
Step 2
Now for the most tedious part in any photo manipulation, also one of the most important parts; the extraction of our subject. This one isn't all that hard to extract because the outline of the man is quite simple. Sometimes when we are given a photo with a white background we can use the magic wand tool or the color range selection. However you can only really get away with this when the background you are putting it on is also a light color because here if we were to use the magic wand we would be left with a narrow gray outline that will stand out against the black background. What we will do is to create a layer mask on this layer, so select the layer with the person in it then click the layer mask button at the bottom of the layers panel. For those that have not yet encountered layer masks then basically what they do is to hide the parts of the layer where the layer mask is dark and let through the parts where the layer mask is light, for example if the layer mask was filled black then none of this layer would be visible but if it is white like ours is at the moment then everything will be visible. Click on the layer mask then select a brush of about 20px and 80% hardness with the foreground color still at black. Now draw round the outline of his clothes, you won't need to be too accurate as the color of his suit and the background are about the same anyway. You may need to use a smaller brush for some parts so just change the size or hit the '[' button to make it smaller and the ']' button to enlarge it. The hair is a bit trickier and will require you to change the opacity of the brush but only go round the basic shape of the hair and don't worry about the strands that stick out as they won't be seen anyway on the black background after going round the person just fill any parts out with this black. The first image shows what it should look like after masking and the second, what my layer mask looked like. Okay since this isn't a masking tutorial I've decided to be nice and post my layer mask so you don't need to extract anything. If you're reading this and you have just extracted the image then think of it as good practice but if you skipped ahead and don't want to spend too much time on the extraction then you can download the layer mask which I've put on my site here. To use this, copy it into your document then go select>color range and set fuzziness to 200 then click on the white part now go to the layer with the man on it and if you have already put a layer mask on this image then delete it and just click on the layer mask button in the layers panel.![2[4]](http://photoshoptutorials.ws/images/stories/FashionShot_695/24.jpg)
![3[4]](http://photoshoptutorials.ws/images/stories/FashionShot_695/34.jpg)
Step 3
Next I duplicated this layer then moved it behind the original layer and scaled and moved it to the left slightly. I then grabbed a large soft brush with an opacity of about 30% and brushed over his face in the layer mask. I then duplicated the original layer again and moved it behind also then went edit>transform>flip horizontal and scaled and moved it slightly. On this layer brushed over his trousers and the bottom of his shirt in the layer mask. Usually when I'm working in Photoshop I add a layer mask to every layer I create just out of habit as it allows for a lot of subtle changes which can be changed throughout the process unlike using the eraser tool. Okay your image should look like the one below, now just change the opacity to both of these new layers to about 10%.![4[4]](http://photoshoptutorials.ws/images/stories/FashionShot_695/44.jpg)
Step 4
Create a new layer group then select the three layers with the people in then drag them into this layer group. It is a good idea to name this group sensibly as we will have a few groups after we have finished. Now click on the group and add a layer mask, the reason I added a layer mask to the group was that if I wanted to hide parts of all three of these layers then I could do so with this mask. Grab a large soft brush with an opacity of about 30% then brush over the left side (his right) of his body and also his trousers and some of his hair in order to blend him into the background. Try and get him looking like the image below.![5[4]](http://photoshoptutorials.ws/images/stories/FashionShot_695/54.jpg)
Step 5
Create a new layer group above this called 'adjustments'. This is where we will add adjustment layers to make the image look better. The advantages of using adjustment layers over layer adjustments are that an adjustment layer comes with a layer mask so your adjustment can be applied to selected parts of your image also a lot can be changed later on in the design like the settings or the opacity. You'll probably agree with me when I say that that this man's fashion sense isn't all that great. But with some easy Photoshopping we can change this very quickly. Firstly the navy blue suit would look a lot better black in order to match his hair and our background. The brown belt doesn't match so we will also change that to black and the blue shirt would look better light gray. This all makes for an easy adjustment because all we need is to desaturate all hiss clothes then change the brightness and contrast of the some of the parts. Start by creating a hue/saturation adjustment layer (next to the layer mask button) and change the saturation to -100, in other words grayscale. Now select the layer mask and using a soft black brush with about 30% opacity, paint onto his face. We still want his face to be of a low saturation as shown in the image below so don't brush too much. If you're really into your small details like me then do the same with the small part of his hand that you can see.![6[4]](http://photoshoptutorials.ws/images/stories/FashionShot_695/64.jpg)
Step 6
Next I added a brightness/contrast adjustment layer this was to make the shirt lighter, increase the contrast on the face and neutralise the tone on the suit. So add a brightness/contrast adjustment layer and use about +67 for the brightness and about +42 for the contrast. Now you will notice that his left sleeve is now a bit too bright so click on the layer mask and use a soft brush with about 90% opacity, black and brush over this sleeve. I also brushed over the other side of the suit and the trousers this was just in case I added anything else to this part of the image. Keep working at it until you are happy, here is what mine looked like after applying this adjustment.![7[4]](http://photoshoptutorials.ws/images/stories/FashionShot_695/74.jpg)
Step 7
I next added another brightness/contrast this time with settings at -62 for brightness and +53 for contrast. This was to make the whole image darker while still retaining the contrast so no layer mask on this one. Then another brightness/contrast layer, this one was to darken the hair slightly. I used a brightness of -83 and a contrast of 0. Next click on the layer mask for this adjustment then go image>adjustments>invert, this will turn the layer mask black. Grab a soft brush with an opacity of about 80% and brush over some of the hair using white in the layer mask, and this actually darkens the hair.![8[4]](http://photoshoptutorials.ws/images/stories/FashionShot_695/84.jpg)
Step 8
Now I wanted to add some lighting to the background and also bring out the middle reflection of our man. So create a new layer directly above the background layer then select the brush tool and use a size of 300px and a hardness of 0% and an opacity of 100%. With white as the foreground color, brush from around the man's left shoulder, in a kind of, I used boomerang shape. Then go filter>blur guassian blur with 100px. Lastly change the opacity of this layer to 50%.![9[4]](http://photoshoptutorials.ws/images/stories/FashionShot_695/94.jpg)
Step 9
Now create a new layer group directly above the background layer and name it 'background', this will contain some detail to the background rather than just having it plain black. The first thing we will add to this layer group is some elliptical shapes which will be hardly visible. First select the gradient tool and in the main toolbar open up the gradient editor and make a gradient going from a very dark color; almost black to pure black. Now create a new layer and select the elliptical marquee tool and draw an ellipse select the gradient tool again and drag from one side of the ellipse to the other then deselect by going select>deselect. Do this four times with different ellipses, each time in a new layer. Below I have shown where I made the ellipses, I added a stroke to these just so you could see them in this tutorial but don't add a stroke to yours. Feel free to add a layer mask to any of these if you want to blend them more, I did it for one of my ellipses.![10[4]](http://photoshoptutorials.ws/images/stories/FashionShot_695/104.jpg)
![11[4]](http://photoshoptutorials.ws/images/stories/FashionShot_695/114.jpg)
![12[4]](http://photoshoptutorials.ws/images/stories/FashionShot_695/124.jpg)
![13[4]](http://photoshoptutorials.ws/images/stories/FashionShot_695/134.jpg)
Step 10
Next I created two more layers and used white splatter brushes, a lot of these can be found here but you can also get away with using some of the ones Photoshop has built in. Lower the opacity of these layers a lot and add a layer mask for any blending. Below you can see roughly where I put the splatters. All these details should be very faint but will build up gradually.![14[5]](http://photoshoptutorials.ws/images/stories/FashionShot_695/145.jpg)
Step 11
To brighten some of the splatters I added a brightness/contrast adjustment layer and used +150 for the brightness and 0 for the contrast. Select the mask and invert it as we did in step 8. Now with a soft white brush of about 125px and 100% opacity add some dots to this layer mask by just pressing in the same place about three times. You should now have something that looks like the image below.![15[4]](http://photoshoptutorials.ws/images/stories/FashionShot_695/154.jpg)
Step 12
Okay, now we will create the lines that you see. For this you need Adobe Illustrator, if you don't have Illustrator you can get a similar effect by using brushes like these although you will get a better result with Illustrator. First save your image as a Jpeg but keep it open then open up Illustrator and open the Jpeg image. Now select the pen tool and set it to no fill and 1px white stroke in the main toolbar.Step 13
With the pen tool draw a path like so, this is same as how you would do it in Photoshop; holding and dragging at each point to smooth the curve. Note that I have tried to follow the edge of the jacket and this is why I pasted the image into Illustrator.![17[4]](http://photoshoptutorials.ws/images/stories/FashionShot_695/174.jpg)
Step 14
After ending the last path, create a new path following his shoulder roughly.![18[4]](http://photoshoptutorials.ws/images/stories/FashionShot_695/184.jpg)
Step 15
Next select the blend tool (W) and click on the first path then the second, you will now see that a new line has been added between these two but we want more lines. Hit return then use the settings shown below.
![19[4]](http://photoshoptutorials.ws/images/stories/FashionShot_695/194.jpg)
![19[4]](http://photoshoptutorials.ws/images/stories/FashionShot_695/194.jpg)
Step 16
with this done, select the whole shape then copy it, now go back to Photoshop and make a new layer group at the top of the layer stack then paste this shape inside that group. A dialog box should pop up, if it gives an option to paste it as a smart object then do this, if not paste it as pixels. The smart object will keep it as a vector so we would be able to scale it up without losing quality if we wanted.![20[4]](http://photoshoptutorials.ws/images/stories/FashionShot_695/204.jpg)
Step 17
Now do the usual; add a layer mask then using a large, soft, low opacity, black brush blend it into the background and also remove the hard ends on all the lines. Lastly lower the opacity slightly; I used 75% for mine.![21[4]](http://photoshoptutorials.ws/images/stories/FashionShot_695/214.jpg)
Step 18
I did this a few more times to other parts of the image where I thought this would look good. Below are images giving you ideas of where you could use these lines.In this one I made the lines start at the collar and expand outwards, I used a 2px stroke for in Illustrator on these lines. Once in Photoshop I had mask out the part that covered the chin to make it look like it went behind the chin then added the usual blending.
![22[4]](http://photoshoptutorials.ws/images/stories/FashionShot_695/224.jpg)
![24[4]](http://photoshoptutorials.ws/images/stories/FashionShot_695/244.jpg)
![25[4]](http://photoshoptutorials.ws/images/stories/FashionShot_695/254.jpg)
![26[4]](http://photoshoptutorials.ws/images/stories/FashionShot_695/264.jpg)
Step 19
Select the brush tool and choose a 2px hard white brush. This last line I made in Photoshop by creating a simple path; shown below, with the pen tool. I made it so it looked like it was following the jacket.![27[4]](http://photoshoptutorials.ws/images/stories/FashionShot_695/274.jpg)
Step 20
Right click on this path then select stroke path and make sure simulate pressure is checked, then hit OK.![28[4]](http://photoshoptutorials.ws/images/stories/FashionShot_695/284.jpg)
Step 21
The image now looks quite nice but here I'll show you how I added some more details to bridge the gap between the foreground and the background. First create a new layer group above the background group then select the pen tool and in the main toolbar choose shape layers. I had my foreground color set at black here but it doesn't matter because we will be hiding it anyway. So draw a path the same as the one below then make sure this layer is within our new group. Everything else from now on should be created within this group.![30[4]](http://photoshoptutorials.ws/images/stories/FashionShot_695/304.jpg)
Step 22
Now right click on this layer and select blending options. This technique I am showing you now is trying to recreate a technique that I learned from Nik Ainley and gives the effect of part of the image being punched out the rest and gives a bit of depth. So use the settings I have shown below. You will notice I've lowered the fill opacity to 0%; this will make only the layer styles show up and not the actual fill of the shape we created. I also checked 'layer mask hides effects', this just means that the styles will only follow the shape and not the mask and so will be hidden if we brush over it with black in the mask. I tend to almost always have this ticked as it is annoying when you add a style and it follows the mask.![31[4]](http://photoshoptutorials.ws/images/stories/FashionShot_695/314.jpg)
![32[4]](http://photoshoptutorials.ws/images/stories/FashionShot_695/324.jpg)
![33[4]](http://photoshoptutorials.ws/images/stories/FashionShot_695/334.jpg)
![34[4]](http://photoshoptutorials.ws/images/stories/FashionShot_695/344.jpg)
Step 23
Here I've added more lines, still below the man, using exactly the same technique as we did before. Here are the ones I added:![35[4]](http://photoshoptutorials.ws/images/stories/FashionShot_695/354.jpg)
![36[4]](http://photoshoptutorials.ws/images/stories/FashionShot_695/364.jpg)
Conclusion
I've kept this tutorial reasonably flexible so you should be able to adapt it to fit any subject or color scheme by just changing small parts. I hope here you have learned how to use layer masks effectively as I think they were used in almost every step. So just have fun with techniques I have shown you here and I hope you find something useful to do with them.
source: photoshoptutorials.ws
0 comments:
Post a Comment