[postlink]http://testlifepsd.blogspot.com/2010/02/adaptive-contrast.html[/postlink]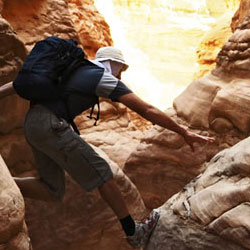 Learn a better way to increase contrast using Photoshop. This Photoshop technique protects your image from having blown out highlights and shadows while you increase contrast. Follow this Photoshop tutorial to learn how to apply this new technique.
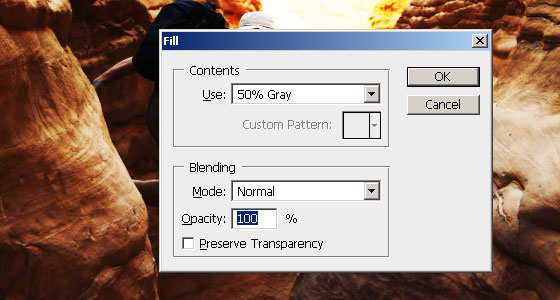
 In the Fill settings, use the settings from the image below.
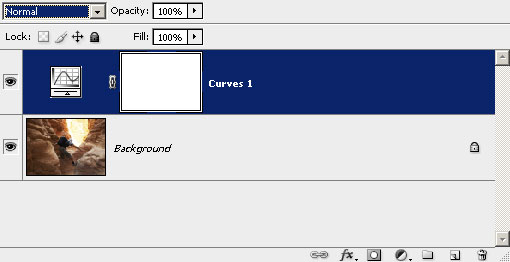 With the layer mask selected, press the delete key on your keyboard and choose Select > Deselect.
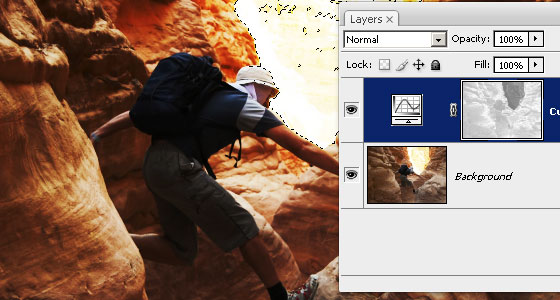 The data in the layer mask looks quite low in contrast. Choose Image > Adjustments > Auto Levels to automatically increase the contrast. As you can see in the layer mask, the highlights and shadows are darker and the midtones are brighter. This layer mask that we jut created is only allowing the Curves adjustment layer to affect the midtones in the image. Generally, this works well with landscape photos because it preserves the details in the shadows and highlights.

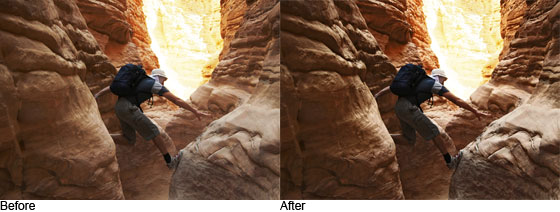
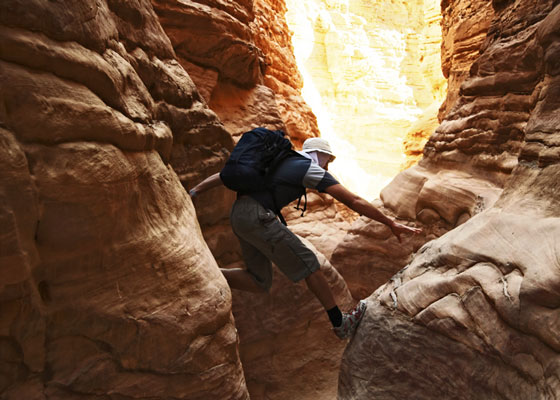 Here is a comparison of the original photo and the photo with this adaptive contrast tutorial applied. The image now has higher contrast without blowing out the shadows on the hiker's backpack and the highlights in the distance.
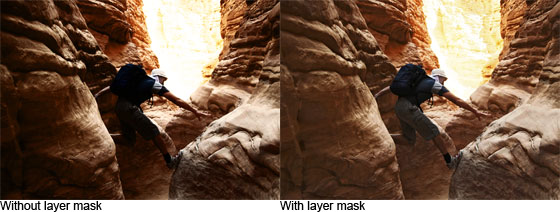
 Below is a comparison between increasing contrast normally and using this adaptive contrast technique. Without the layer mask, the shadows and highlights are blown out.
 Below are examples of the adaptive contrast effect with an inverted layer mask applied to a portrait. The layer mask is inverted because we want to preserve the skin tones. That way, the contrast is only increased in the highlights and shadows.
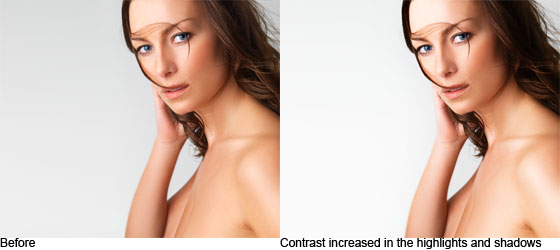 Below is a comparison between the contrast enhancement with and without a layer mask. The image on the left shows how the image would look like without a layer mask. The image on the right shows the same contrast but with the adaptive contrast technique applied. The contrast is increased only in the hair and the highlights of the skin; the midtones in the skin are preserved to keep it looking natural.
class="step"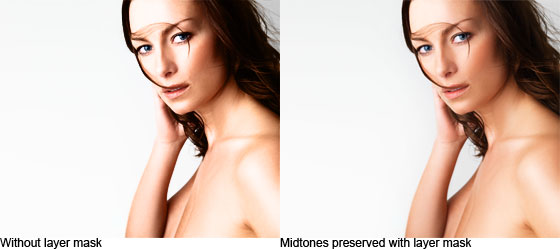
 Repeating this process may take a lot of effort. Now that you know how this effect works, why not use a Photoshop action instead? To use the Photoshop action:
Learn a better way to increase contrast using Photoshop. This Photoshop technique protects your image from having blown out highlights and shadows while you increase contrast. Follow this Photoshop tutorial to learn how to apply this new technique. Adaptive Contrast Photoshop Tutorial
Step 1: Load a photo into Photoshop
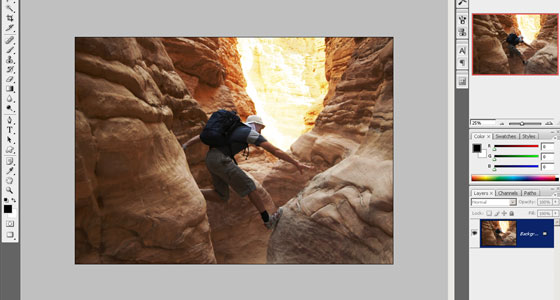
To open an image, choose File > Open. Browse for the image file then click OK.Step 2: Increase contrast
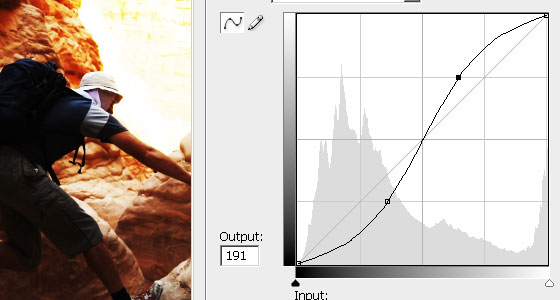
First, we'll increase the contrast as we usually would. There are many ways to increase contrast but we'll show you how to do it using Curves. Choose Layer > New Adjustment Layer > Curves. In the Curves tool, create a slight S curve like the image below.Step 3: Create a new 50% gray layer
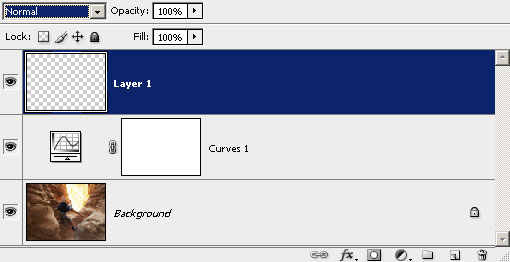
Now we'll create the mask for the Curves adjustment layer. The mask will specify how visible the Curves adjustment layer is according to the brightness of the area. To do this, we first need to create a layer with a 50% gray fill. Create a new layer then choose Edit > Fill.Step 4: Create a custom selection using Calculations
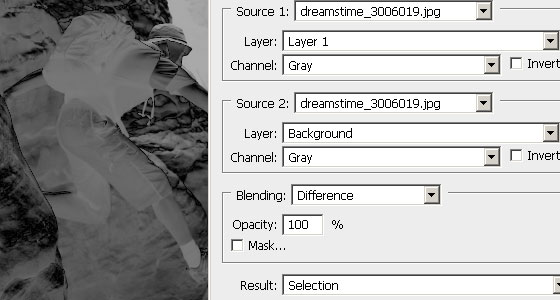
With the 50% gray layer created, we will use the calculations tool to create the mask that will be used for the Curves adjustment layer. Choose Image > Calculations and enter in the settings below. This will create a selection around the highlights and shadows of the image.Step 5: Apply the selection to the layer mask
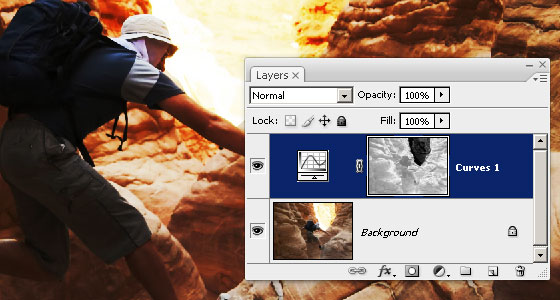
Delete the top layer with the gray fill then select the layer mask.Step 6: Change the blending mode to luminosity
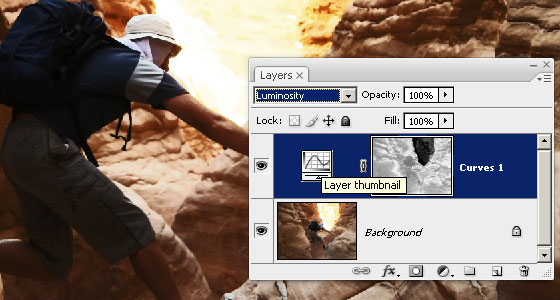
Your image should look more saturated than it was before. If you don't like the increased saturation, change the blending mode of the Curves adjustment layer to Luminosity and the saturation will return to normal.Step 7: Adjust the layer mask
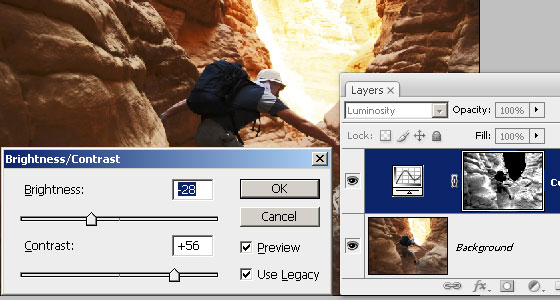
Now we're going to work on the layer mask and adjust where we want the contrast to be applied and where not. Select the layer mask then choose Image > Adjustments > Brightness/Contrast. If you are using Photoshop CS3, check the "Use Legacy" option. While looking at the photo and layer mask, adjust the brightness and contrast settings. The brightness settings will adjust the overall visibility of the contrast. The contrast setting will adjust the compression between the shadows/highlights and midtones.Step 8: Blur the layer mask
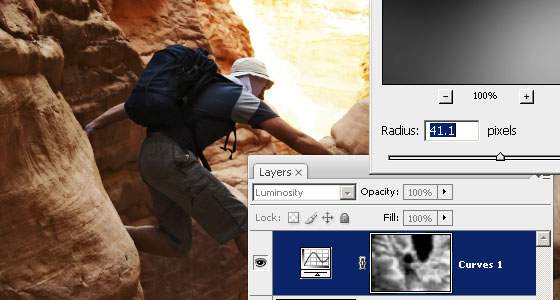
Finally, we'll blur the layer mask. This will produce results similar to enhancing local contrast. Choose Filter > Blur > Gaussian Blur. As you increase the radius, the contrast between the edges will increase.Step 9: Invert the layer mask (optional)
Depending on the results that you desire, you may also invert the layer mask so that contrast is applied to the shadows and highlights but not the midtones. To invert the layer mask, choose Image > Adjustments > Invert.Layer mask not inverted
- This works well with landscape photos and can produce results that look slightly like HDR tone mapped images. Preserves detail in the highlights and shadows. Only the midtones will have its contrast enhanced.
Layer mask inverted
- This works well with portraits and certain landscapes. With portraits, you generally want to preserve the details of the skin tones which usually is in the mid tones. With the layer mask inverted, the image appear to have more contrast without affecting the midtones.
Final Results
class="step"
Adaptive Contrast Photoshop Action
Repeating this process may take a lot of effort. Now that you know how this effect works, why not use a Photoshop action instead? To use the Photoshop action: - Download the Adaptive Contrast Photoshop action and save it to your computer.
- Run Photoshop and choose Window > Actions. Click on the Actions palette menu near the top right of the Actions palette and choose "Load Actions".
- Browse for the file you downloaded then click OK.
- In the Actions palette, open the "Adaptive Contrast" folder and select one of the two actions. One of the action will preserve highlights and shadows. Choose this action if you want to restore hidden details. The other action will preserve the midtones. Choose this action if you want a more dynamic effect that will blow out the highlights and shadows but not the midtones. Click on the play button near the bottom of the Actions palette and watch Photoshop apply the Adaptive Contrast effect.
source: photoshoptutorials.ws
0 comments:
Post a Comment