The Drawing and Type tools are used to create vector graphics, as well as set type inside of documents. While Photoshop is not really considered a vector graphic editor, it is possible to create vector based shapes and elements that can be resized without losing quality!
The Type Tools
The default type tool is the Horizontal Type Tool, which is used to set horizontally oriented type inside of an image. Although Photoshop is a raster based program, it preserves the vector-based type outlines meaning that type can be scaled to any size without losing quality. This property allows us to easily configure type size, style, and other attributes, as well as modify them later on in the design process.
Enough of the technical side though. To set type in an image, first select the Horizontal or Vertical Type Tool, and click anywhere inside of your image. You should immediately see a cursor start blinking where you can begin typing. In the options bar, you’ll notice some settings for the currently selected type.

Font Style – Set the font style of the currently selected type. Common styles include bold, italic, and regular.
Font Size – Change the size of the selected type.
Anti-Aliasing Method – Set the method used for anti-aliasing on your type. Anti-Aliasing allows you to create smooth edged type by partially filling edges of the text (rather than the single color, jagged alternative when set to “None”).
Here’s a quick demo showing how Type can be adjusted (Rollover to see changes):
There is much more to Type in Photoshop than shown here, but it would be way outside the scope of this lesson to give much more than a cursory glance of how to use this tool. Additional reading on the Type tool can be found elsewhere on Tutorial9.
Using Shape Tools in Photoshop
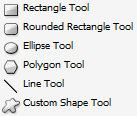
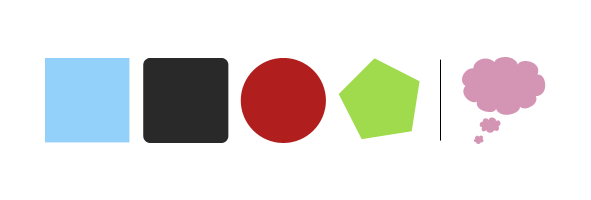
There are quite a few predefined vector-based shapes in Adobe Photoshop, all of which can be easily added to graphics. There are 6 different kind of Shape Tools in all.
 Rectangle Tool – Creates a rectangle shape (or square if constraining proportions by holding shift).
Rounded Rectangle Tool – Creates a rectangle with rounded corners. The roundness of the corner can be controlled by setting a radius in the options bar.
Ellipse Tool - Creates an ellipse shape (or perfect circle if constraining proportions by holding shift).
Polygon Tool – Creates a polygon shape with a specified number of sides set in the options bar.
Line Tool – Creates a line shape.
Custom Shapes – Use predefined shapes (or user created ones) in your graphic.
To create a shape in your image, simply select the shape tool you want to use, adjust the settings for that tool in the options bar, and then drag our your shape in the active image area (in the same fashion you’d create a selection with one of the selection tools).

 Be Aware! When you are creating new shapes in Photoshop, make sure you have Shape Layers selected to create new shapes. Otherwise, you may end up creating non-vector based shapes on the current layer, or paths rather than vector-based shapes on there own individual layer.
The Pen Tool
The Pen Tool is often considered by beginner users to be the most difficult tool to get used too. Thankfully, we’ve put together a great little guide to help such users familiarize themselves with the pen tool. Check out our Pen Tool Basics tutorial to learn how to use the pen tool, and how to create your very own custom shapes in Photoshop.
source: tutorial9.net

0 comments:
Post a Comment