[postlink]http://testlifepsd.blogspot.com/2010/01/edge-sharpening.html[/postlink]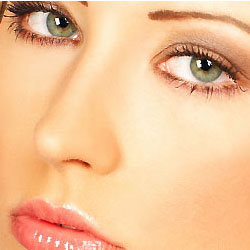 Sharpen the edges of a portrait without sharpening the skin. This sharpening technique detects edges and applies sharpening only to the edges.
To start, we'll apply a simple sharpening to the image.

 ).
).
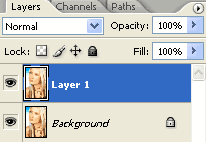
 Now you should have two layers; one with the sharpening applied and one without.
Layer: Background
Channel: RGB
Invert: Unchecked
Blending: Normal
Opacity: 100%

Rollover the image above to see the before and after effect.


Sharpen the edges of a portrait without sharpening the skin. This sharpening technique detects edges and applies sharpening only to the edges. To start, we'll apply a simple sharpening to the image.
Edge Sharpening Photoshop Tutorial
Step 1
Open a photo you would like to edit. Or, you may use the photo used in this tutorial (from iStockPhoto). Step 2
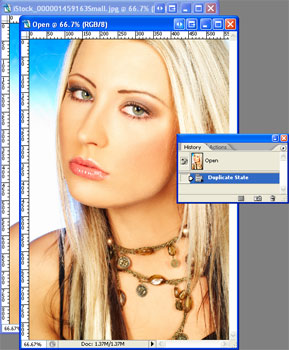
Duplicate the layer and apply your desired sharpening technique on the new layer. Some basic sharpening tools are available in the Filter> Sharpen> menu. For this tutorial, we will use the luminance sharpening technique which only sharpens the grayscale data and leaves the color data untouched. However, to do this, we’ll need to change the image mode to LAB color. Because changing the image mode too much will affect the image quality, in the next step, we’ll create a duplicate state to apply the luminance sharpening to.Step 3
Create a duplicate of the image. In the History pallet (Window> History), click on the Duplicate State button ( Step 4
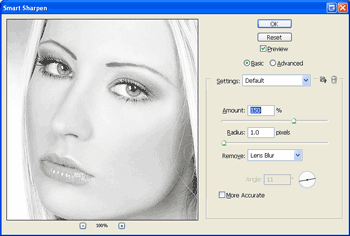
With the new image file, apply your desired sharpening technique. I will be using the Smart Sharpen filter (Available on Photoshop CS2+ only) on the luminance channel. Go to Image> Mode> Lab Color to convert the image to Lab color. Then, press Ctrl+1 to select the luminance channel. The image should now appear grayscale. Go to Filter> Sharpen> Smart Sharpen and use the tool to sharpen the image. If the Smart Sharpen filter isn't available, use the Unsharp Mask filter (Filter> Sharpen> Unsharp Mask) instead. Step 5
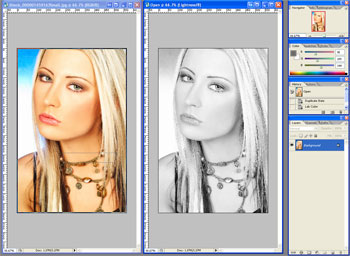
Select Window> Tile Vertically or Tile Horizontally (either one is fine). The two documents should now be side by side. Activate the window with the sharpened image. Click on the Background layer in the layers pallet and drag the layer to the window with the original, unsharpened image. Edge Detection
Before we can filter where the sharpening is visible, we need to find the edges of the image.Step 6
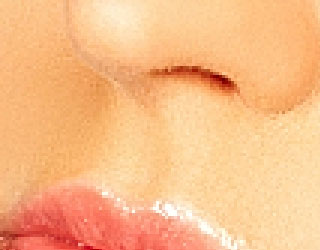
Zoom in to about 300% so that you're able to clearly see the fine pixel-sized details. Notice the grain on the skin caused by sharpening in the photo below. Step 7
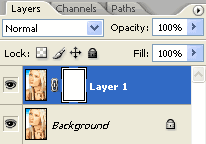
To remove this, we'll need to create a layer mask with the edges. Activate the top layer and add a layer mask (Layer> Add Layer Mask> Reveal All). Step 8
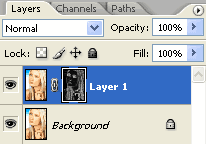
Make sure the layer mask is activated. The thumbnail of the layer mask in the layers window should have a white border around it. If it doesn't, click on the thumbnail to activate the layer mask.Step 9
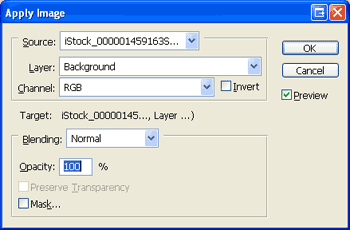
Now we'll copy the photo into the layer mask. With the layer mask activated, open the Apply Image tool (Image> Apply Image) and apply these settings:Layer: Background
Channel: RGB
Invert: Unchecked
Blending: Normal
Opacity: 100%
Step 10
Add a Find Edges filter (Filter> Stylize> Find Edges) and Invert (Ctrl+I). The Find Edges filter detects the edges and we inverted the image so that the edges are opaque. Step 11
You'll immediately notice a difference when you invert the layer mask. The skin now appears to be smooth but we're going to do some further tweaking for better results.Rollover the image above to see the before and after effect.
Layer Mask Tweak
Before we end this tutorial, we'll show you some methods to tweak and enhance the results of the edge sharpening.Step 12
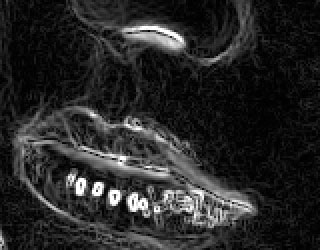
Hold the Alt key and click on the layer mask thumbnail located in the Layers pallet. The image should now look like an inverted black and white sketch. Notice the curly lines on the areas where the skin is. Those fine lines are telling us that those areas are being sharpened as well. Step 13
Removing those fine curly lines is simple with the Levels tool. Open the Levels tool (Image> Adjustments> Levels or Ctrl+L) and move the middle input slider towards the right until the thin lines disappear. Step 14
Hold the Alt key and click on the layer mask thumbnail again to view the final results.Final Results
source: photoshoptutorials.ws
0 comments:
Post a Comment