Step 1
We’ll be talking specifically about Photoshop Brushes in this tutorial, but the process is exactly the same for adding and managing Swatches, Gradients, Styles, Patterns, Contours and Custom Shapes as well, so just know that even though I’m talking about brushes, the information shared here applies the all these. Before we get into the meat of the lesson, lets start by taking a quick look at how Photoshop stores and uses these things.
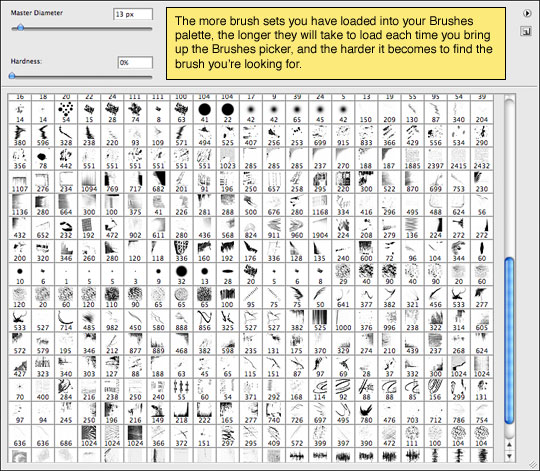
Photoshop allows us to keep as many brushes in the Brush palette as we’d like, but the more stuff you pack into the palettes the slower those palettes will load (because every brush takes a little memory) and the harder it’ll be to find the brush you’re looking for. I find that organizing and properly naming my brush sets in an external Brushes folder and then loading only the brushes I need for a specific project makes my life much easier.
Step 2
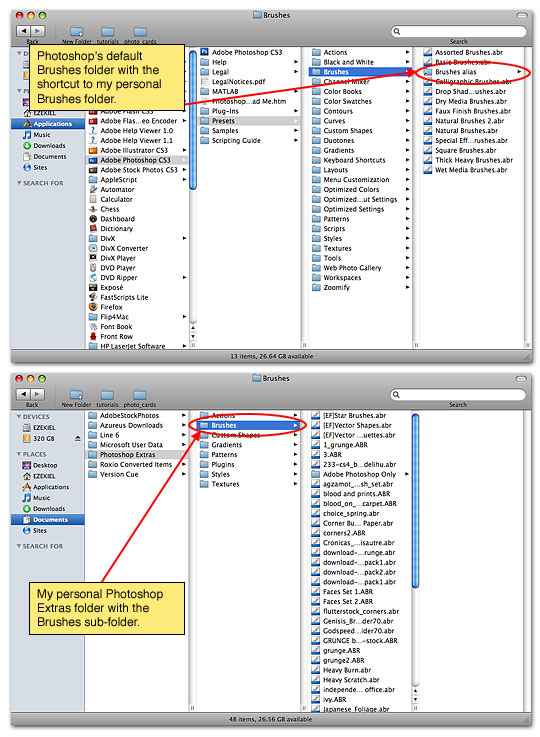
By default, Photoshop keeps it’s extras and plugins inside it’s program files folder structure, and although you could simply load everything into Photoshop’s default folders, I find it’s useful to create a folder set of my own to keep additional Brushes etc. inside. There’s nothing more frustrating than spending hours and hours searching for and downloading the perfect brushes only to loose them accidentally when upgrading or re-installing Photoshop.
I keep a folder called Photoshop Extras in the Documents folder of my computer, and in that folder I have sub-folders for all the different kinds of add-ons that Photoshop can use. I keep all my downloaded brush sets there. To make Photoshop see the contents of this extra folder, all you have to do is create a shortcut to this additional folder in Photoshop’s default brushes folder and SHAZAM! the brushes from both folders will appear in the Preset Manager.
Like I said, this step isn’t necessary, and it’s just fine if you want to put your new brushes in Photoshop’s default Brushes folder, but this what I do because it makes it easy to backup, restore and even share all my 3rd party stuff. Plus, it satisfies my obsessive compulsive need for excess organization.
Step 3
Ok, with my compulsive organizational speech out of the way, lets go ahead and find a set of brushes to install. There are a ton of great places to find free Photoshop Brushes on the internet, but probably the most comprehensive and FREE brush site I’ve found is BrushKing.eu (at this moment the site has 239 Brush sets containing an astounding 4285 Brushes). And I’m proud to have them as a sponsor of the site this month, so please take some time to check out their huge brush selection. Did I mention they’re free?
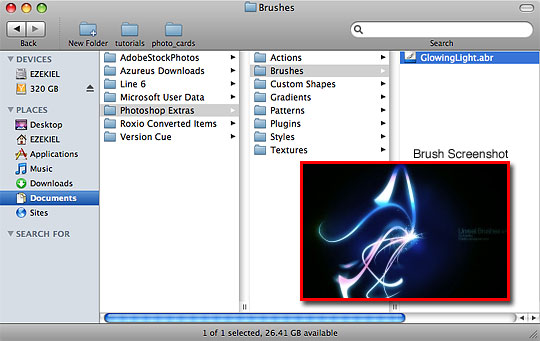
If you want to follow along at home, I’m downloading a brush set called "Unreal Brushes v.4", and once it’s downloaded I’m going to put it into the Photoshop Extras> Brushes folder that I mentioned above. You’ll notice that sometimes these brush sets download with funky names, so I always rename them with a description that I’ll recognize, in this case I’ll call them "GlowingLight.abr" because that’s what the screenshot for the brushes looked like.
(*note: For this example I’ve cleared out my Brushes folder so it’s easy to see the new brush set.)
Step 4
Now that the new brush set has been moved to our Brushes folder and renamed, lets open Photoshop and load it into our Brush Picker!
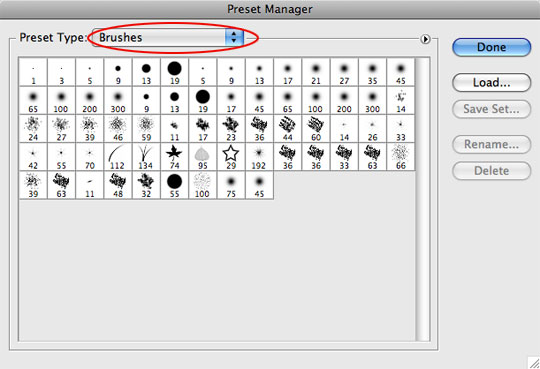
Although you can load brushes from the Brush Picker itself, let me show you another way. From the Main menu choose Edit>Preset Manager. The Preset Manager allows you to manage all your presets from one place and I’ve found it seems to work a little faster than working directly inside the Brush picker.
Choose Brushes from the drop-down menu at the top.
Step 5
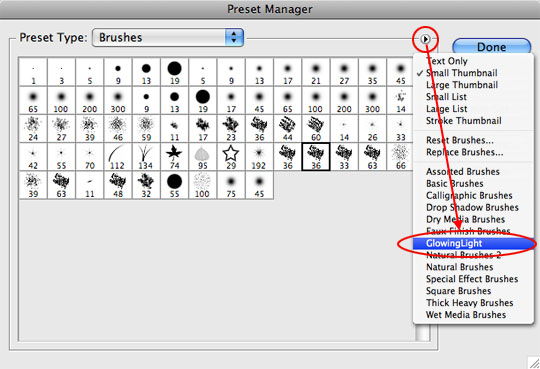
Inside the Preset manager you’ll notice a little circle with an arrow inside it at the top right side of the display area, and if you click it with your mouse it will open up a menu that has been populated with all the available brushes from Photoshop’s Brushes folder (as well as the brushes from the secondary Brushes folder that we talked about earlier if you chose to create it). You can see in the example below that my GlowingLight brush set is listed.
When you click on one of the brush sets, Photoshop will give you two options, to either add this new brush set to your existing brushes or to replace the existing brushes, click Append to add them, or OK to replace them. For my example I just clicked OK to replace the existing brushes with the new set.
(*note: Photoshop builds a cache of available brushes when it first opens, so if your new brush set doesn’t show up and you already had Photoshop running, you may need to restart the program to get it to appear in the list.)
Step 6
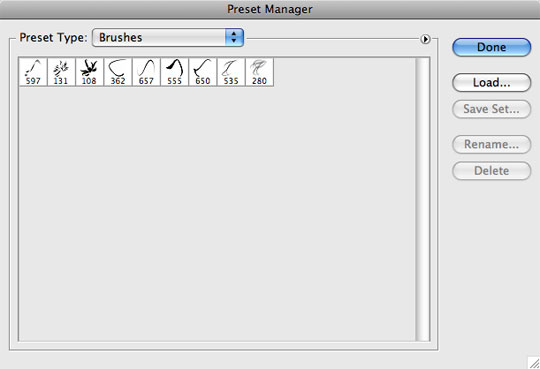
You can now see that the stock brushes in my Preset Manager have been replaced with the new GlowingLight set I chose.
On a side note, while inside the Preset Manager you can click and drag brushes to re-order them and you can delete a brush from the manager by Option-Clicking (PC: Alt-Clicking) on it. Deleting a brush from the picker is non-destructive and if you reload that brush set, the brush you deleted will re-appear (unless of course you resave the brush set over itself, and in that case any changes you’ve made will obviously be permanent).
And that’s it folks, the brushes are loaded and available for use and now you know how to add Brushes (as well as Shapes, Gradients etc) to the Photoshop Preset Manager and hopefully you’ve picked up a trick or two about file handling and organization along the way.
0 comments:
Post a Comment