[postlink]http://testlifepsd.blogspot.com/2010/01/smooth.html[/postlink] Smooth and reduce details without losing edges. This contemporary effect is great for hiding flaw in portraits.
Make sure that the image is in RGB color mode. To switch to RGB color mode, click on RGB Color under the Image> Mode menu.


Layer: Background
Channel: RGB
Blending: Normal
Opacity: 100%

 Smooth and reduce details without losing edges. This contemporary effect is great for hiding flaw in portraits.
 Step 1
Open a photo you would like to edit. Or, you may use the photo used in this tutorial (from iStockPhoto).Make sure that the image is in RGB color mode. To switch to RGB color mode, click on RGB Color under the Image> Mode menu.

Step 2
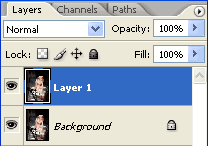
Duplicate the current layer (Layer> Duplicate Layer or Ctrl+J).
Step 3
Select the top layer and apply a Median filter (Filter> Noise> Median). In the Median filter tool, use a Radius that will blur most of the detail without losing the shape of the objects.
Filtering the Effect
The effect is applied, but it's applied to the entire image. Now we need to filter it so that it's not applied on the edges.Step 4
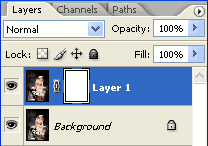
Add a layer mask to the top layer (Layer> Add Layer Mask> Reveal All).
Step 5
Make sure the layer mask is activated. The thumbnail of the layer mask in the layers window should have a white border around it. If it doesn't, click on the thumbnail to activate the layer mask.Step 6
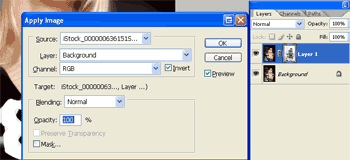
With the layer mask activated, use the Apply Image tool to apply the following properties:Layer: Background
Channel: RGB
Blending: Normal
Opacity: 100%

Step 7
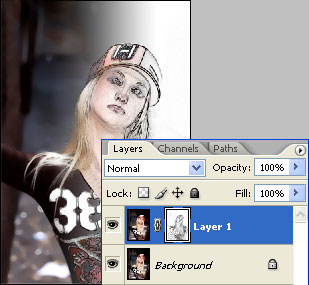
Apply a Find Edges filter (Filter> Stylize> Find Edges). The image should now appear to have its edges restored.
Step 8
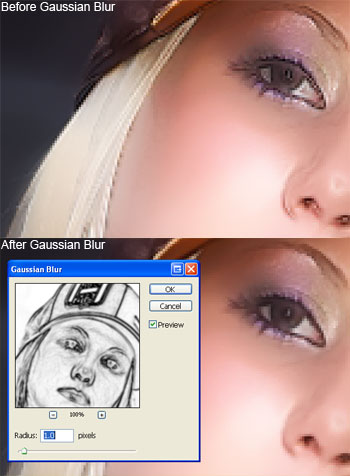
If you look closely at the image, you'll be able to notice the outline on the edges. To remove this, we'll simply apply a gaussian blur with a radius of 1 pixel.
Final Results
Rollover to see the before and after effect.
source: photoshoptutorials.ws
0 comments:
Post a Comment