[postlink]http://testlifepsd.blogspot.com/2010/01/white-balance.html[/postlink] Explore the three quick white balance correction techniques and learn how to manually calibrate the balance of each channel. White balance is a feature found in digital cameras to prevent color casts by adjusting the temperature of the photo. However, lighting variance and wrong white balance settings may produce color casts that require post processing.
camera
supports the raw file format and you've taken your photo in this format, you're in luck. White balance in raw files can be easily fixed at none or minimal quality loss. Because most cameras take raw photos in 12 bit color (4096 shades/color) instead of 8 bit color (256 shades/color), this gives you powerful white balance adjustments with no visible loss in quality.
Tip: Don't let the bit number fool you! Although most digital cameras are only able to produce 12 bit out of the 16 bit color, they're still a lot better than 8 bit color. 12 bit color contains 4096 tones per color and that's over 68 million colors and 4000 times better than 8 bit color!


![]() title="jpg" height="16" alt="jpg" src="http://photoshoptutorials.ws/mambots/editors/jce/jscripts/tiny_mce/plugins/filemanager/images/ext/jpg_small.gif" width="16" /> twilight 128.67 Kb (right-mouse click> Save As)
title="jpg" height="16" alt="jpg" src="http://photoshoptutorials.ws/mambots/editors/jce/jscripts/tiny_mce/plugins/filemanager/images/ext/jpg_small.gif" width="16" /> twilight 128.67 Kb (right-mouse click> Save As) 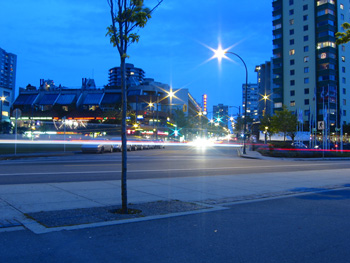
Tip: We use an adjustment layer instead of applying levels directly to the image to practice non-destructive image processing. This way, we always have a backup of the original image as a layer.

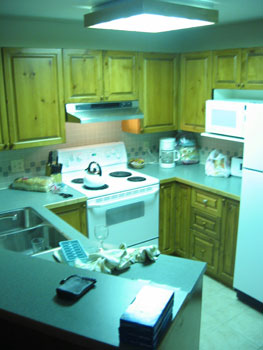
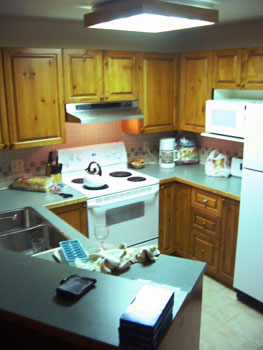
 kitchen 23.94 Kb (right-mouse click> Save As)
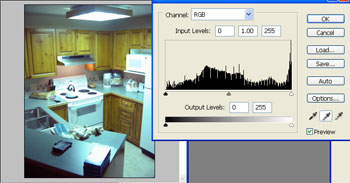
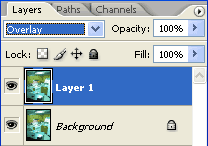
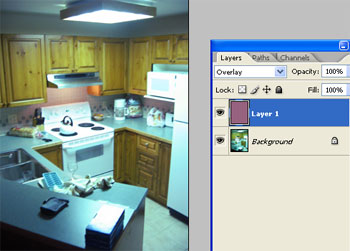
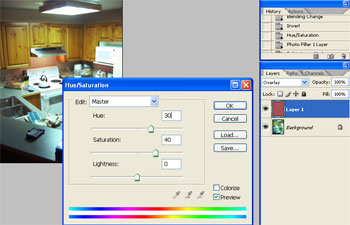
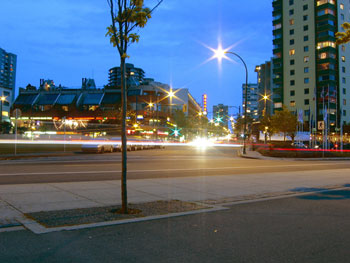
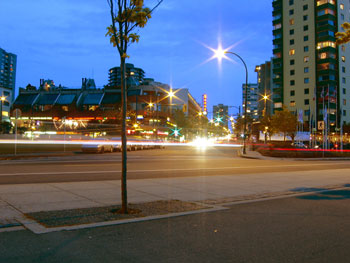
 twilight 128.67 Kb (right-mouse click> Save As)
Tip: Don't press the OK button yet.
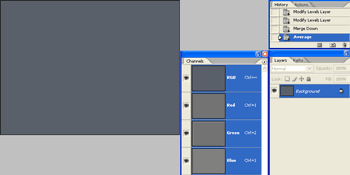 I used the Color Picker tool to view the RGB values that create the color: R: 90 G: 96 B: 106. If the RGB color values were exactly the same (ex. R: 96, G: 96, B: 96), it would mean that all the colors are perfectly even. But R: 90, G: 96, B: 106 is pretty darn good so I'll leave it as it is.
 Explore the three quick white balance correction techniques and learn how to manually calibrate the balance of each channel. White balance is a feature found in digital cameras to prevent color casts by adjusting the temperature of the photo. However, lighting variance and wrong white balance settings may produce color casts that require post processing.
 Quick White Balance Correction Techniques
Here are several of the most popular white correction method that's fast and easy to use. They are sorted by their effectiveness with the best technique first.Color Correcting with Raw Editor
If your digital
Tip: Don't let the bit number fool you! Although most digital cameras are only able to produce 12 bit out of the 16 bit color, they're still a lot better than 8 bit color. 12 bit color contains 4096 tones per color and that's over 68 million colors and 4000 times better than 8 bit color!
Step 1
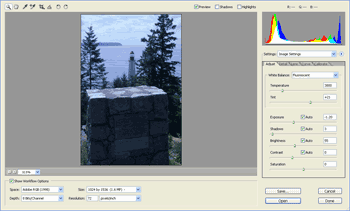
Open your raw file with Adobe Photoshop. The raw editor should appear.
Step 2
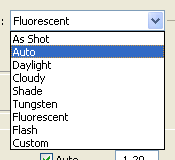
Try using auto white balance first. To do this, select Auto from the White Balance drop down menu. If that doesn't work, try the different options in the drop down menu.
Step 3
If that does not work or if you would like a more precise white balance adjustment, manually select a gray area in your image. To do this, use the White Balance Tool (I) and click on a point that's supposed to be gray. Try to select a point that's closest to 50% gray for best results.
Step 4
You may make final slight adjustments by adjusting the Temperature and Tint sliders.
Final Results
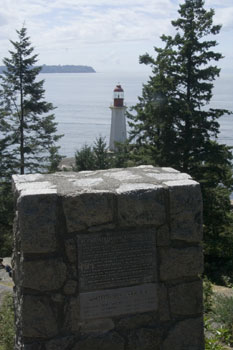
Rollover the image to see the before and after effect.
Color Correcting with Levels
This technique produce the best results and is extremely fast and easy. Use this whenever possible for non-raw photos.Step 1
Download and save the following JPG file to your computer then open it inside Adobe Photoshop.
Step 2
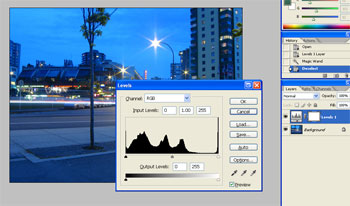
Add a Levels adjustment layer (Layer> New Adjustment Layer> Levels).Tip: We use an adjustment layer instead of applying levels directly to the image to practice non-destructive image processing. This way, we always have a backup of the original image as a layer.

Step 3
In the Levels tool, click on the Gray Point eyedropper. Your cursor should change into an eyedropper. With this tool, you can click on an area that's supposed to gray (50% gray for best results). For the image we're working on, we can simply select on any cement road that seems closest to 50% gray. Try clicking on a few other locations areas with cement to see which color you get. I had to try several times to find the best spot.
Final Results
Rollover the image to see the before and after effect.
Color Correcting with Color Overlay
This is one of the techniques I've developed probably over a year ago when I wasn't very good with Photoshop. It worked very well on some photos, but not on all. If you're unable to fix the white balance with the Levels technique, give this one a try.Step 1
Download and save the following JPG file to your computer then open it inside Adobe Photoshop.
Step 2
Try using the Levels technique above. You'll notice that it's difficult to get the correct white balance and even when you do get better results, it doesn'tseem like it's the best. At times like this, the Color Overlay technique will work well.
Step 3
Let's start this technique. Duplicate the photo layer and change the blending mode of the new layer to Overlay.
Step 4
Apply an Average filter (Filter> Blur> Average) to the new layer then invert the layer(Ctrl+I).
Step 5
To tune the results, open the Hue/Saturation tool (Image> Adjustments> Hue/Saturation or Ctrl+U) and adjust the Hue and saturation slightly. Adjusting the hue will affect the tint and adjusting the saturation will affect the strength.
Final Results
Rollover the image to see the before and after effect.
Manual White Balance Correction
Sometimes none of the previous techniques will properly or accurately fix the white balance. For times like those, we need to manually adjust the levels of the individual color. Follow this workflow to learn how to manually adjust the white balance of an image. The tutorial may seem a bit long, but it's easy to remember and once you learn this method, it's a quick process that can be done minutes.Step 1
Download and save the following JPG file to your computer then open it inside Adobe Photoshop.alt="Twilight Photo" src="http://photoshoptutorials.ws/images/stories/Photoshop%20Tutorials/Photo%20Restoration/White%20Balance/twilight-photo.jpg" />
Step 2
Inside the Channels pallet (Window> Channels), set the thumbnail size to large. To do this, right mouse click on an empty area in the pallet and select Large.alt="Setting the Thumbnail Size" src="http://photoshoptutorials.ws/images/stories/Photoshop%20Tutorials/Photo%20Restoration/White%20Balance/large-thumbnails.gif" />
Step 3
Click on each channel and find the channel that seems to have the proper or best exposure. In this photo we're working on, it seems like the green channel has the best exposure. By comparing the other two channels against the green channel, we can see that the red channel is underexposed and the blue channel is overexposed. Those are the channels/colors that need to be fix.alt="Channels Pallet" src="http://photoshoptutorials.ws/images/stories/Photoshop%20Tutorials/Photo%20Restoration/White%20Balance/channels.gif" />
Fix the Colors
Now that we've found out which color we need to edit, we'll proceed with the next process of fixing the channels.Step 4
Click on the RGB channel to activate all the channels.alt="RGB Channel Selected" src="http://photoshoptutorials.ws/images/stories/Photoshop%20Tutorials/Photo%20Restoration/White%20Balance/select-rgb.gif" />
Step 5
The first step is to find something gray in the photo to use as a reference. For this photo we're working on, we can use the cement sidewalk and road as a reference. Use the Magnifier tool (Z) and zoom in near the bottom right where the cement road and sidewalk is.alt="Magnify to the location bordered red." src="http://photoshoptutorials.ws/images/stories/Photoshop%20Tutorials/Photo%20Restoration/White%20Balance/zoom-in.jpg" />
Step 6
Add a Levels adjustment layer (Layer> New Adjustment Layer> Levels).alt="Levels Adjustment Layer" src="http://photoshoptutorials.ws/images/stories/Photoshop%20Tutorials/Photo%20Restoration/White%20Balance/levels-adjustment-layer.gif" />
Step 7
For us to properly adjust the settings in the Levels adjustment layer, we need to have a view of the individual channels. To do this, close the Levels tool and drag the Channels pallet outside of its window. The Channels pallet should appear in its own window. Now with the individual channels visible in the channels pallet, double-click on the thumbnail of the adjustment layer to open the Levels tool.alt="The channels pallet in its own window" src="http://photoshoptutorials.ws/images/stories/Photoshop%20Tutorials/Photo%20Restoration/White%20Balance/workspace.gif" />
Step 8
To remove the color cast, we need to fix the red and blue channel. We'll edit the Red channel first. Press Ctrl+1 to select Red from the Channel drop down menu in the Levels tool. Click and hold the middle input slider and drag the middle input slider towards the left. While dragging the input slider towards the left, look at the channels pallet and release the input slider when the exposure of the red channel seems identical to the green channel. I set the location of my middle input slider to 1.80.Tip: Don't press the OK button yet.
alt="Editing Red Channel with Levels" src="http://photoshoptutorials.ws/images/stories/Photoshop%20Tutorials/Photo%20Restoration/White%20Balance/red-channel.gif" />
Step 9
Now we'll edit the blue channel. With the Levels tool still opened, press Ctrl+3 to activate Blue channel. Drag the middle input slider towards the right and release when the exposure of the blue channel in the channels pallet matches the green channel. I set the location of my middle input slider for this channel to 1.65. Click OK when done.alt="Editing Blue Channel with Levels" src="http://photoshoptutorials.ws/images/stories/Photoshop%20Tutorials/Photo%20Restoration/White%20Balance/blue-channel.gif" />
Tune the Settings
Although the colors look much better now, it still doesn't seem to look the scene I saw with my eyes. We'll need to find out what's wrong and make further adjustments to fix this.Step 10
Select the top layer and press Ctrl+E to merge down.alt="Layers Merged" src="http://photoshoptutorials.ws/images/stories/Photoshop%20Tutorials/Photo%20Restoration/White%20Balance/merge-down.gif" />
Step 11
Apply an Average filter (Filter> Blur> Average). The Average filter creates a fill of the average color of the image. We can see that the fill is a neutral blue color.alt="Average Filter Applied" src="http://photoshoptutorials.ws/images/stories/Photoshop%20Tutorials/Photo%20Restoration/White%20Balance/average.gif" />
The hue identifies the most prominent color in the image and the saturation of the color shows how prominent the color is. What this means is that there's more blue than any other color in the photo but only by a small amount. If the blue was a bright, vivid blue, it would mean that there's more blue than any other color in the photo by a large amount.
The hue identifies the most prominent color in the image and the saturation of the color shows how prominent the color is. What this means is that there's more blue than any other color in the photo but only by a small amount. If the blue was a bright, vivid blue, it would mean that there's more blue than any other color in the photo by a large amount.
Step 12
Because the average color is a neutral blue, we need to reduce the amount of blue just by a tiny bit. Before we do this, undo the previous two steps you've done by simply clicking the "Modify Levels Layer" state in the History pallet (Window> History).alt="The Layers pallet should contain two layers." src="http://photoshoptutorials.ws/images/stories/Photoshop%20Tutorials/Photo%20Restoration/White%20Balance/history-and-layers.gif" />
Step 13
Find an area on the cement that has a slight blue cast and use the Magnifier tool (M) to zoom into the area.alt="Magnify to the location bordered red." src="http://photoshoptutorials.ws/images/stories/Photoshop%20Tutorials/Photo%20Restoration/White%20Balance/blue-cast.jpg" />
Step 14
Double-click on the thumbnail of the adjustment layer to open the Levels tool. Inside the Levels tool, activate the Blue channel (Ctrl+3). We now need to move the middle input slider towards the right just a bit until the blue cast on the cement is gone. It may be difficult to make tiny adjustments when working on a tiny portion of the histogram. To make adjusting easier, click on the middle Input Levels field and press the down or up button to make changes. To remove the blue cast, I reduced the location to 0.49.alt="Editing Blue Channel with Levels" src="http://photoshoptutorials.ws/images/stories/Photoshop%20Tutorials/Photo%20Restoration/White%20Balance/blue-channel-2.gif" />
Analyzing the Results
The color of the photo looks much better and looks like what I've seen when I was there. I'm going to check to find out how accurate the adjustments I made are. You don't have to do this, but I merged the layers and applied the Average filter to find out how balanced the colors are. The Average filter created a very neutral color.
Final Results
Rollover the image to see the before and after effect.
source: photoshoptutorials.ws
0 comments:
Post a Comment