[postlink]http://testlifepsd.blogspot.com/2010/01/faux-dynamic-range-increase.html[/postlink]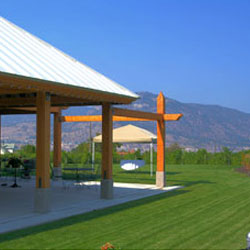 Learn how to artificially increase the dynamic range using one picture. Increasing dynamic range make photos to look more alike to what the eye sees in real life. This technique is also an effective alternative for correcting exposure.

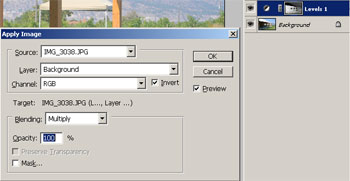
Layer: Background Channel: RGB Invert: Checked Blending: Multiply or Normal (both do the same thing) Opacity: 100%


The Shadow/Highlights tool produces lower quality results with halos between high contrast edges.
Learn how to artificially increase the dynamic range using one picture. Increasing dynamic range make photos to look more alike to what the eye sees in real life. This technique is also an effective alternative for correcting exposure. Fixing the Shadows
First, we'll work on the shadows to correct the exposure.Step 1
Open a digital photo to edit. We recommend using a photo with a good exposure. Any image compression (ex. JPEG compression) should be minimal. The quality of the result greatly depends on the photo used. Step 2
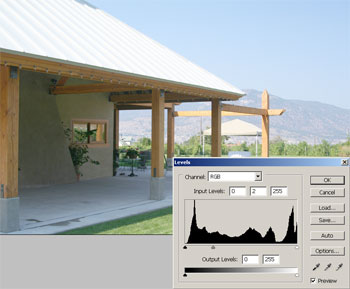
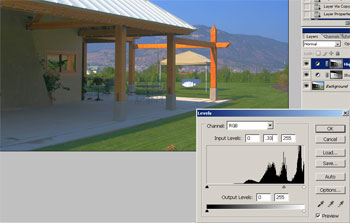
Create a new Levels adjustment layer (Layer> New Adjustment Layer> Levels). In the Levels window, adjust the middle input slider so that the shadows are properly exposed. Don't worry if the highlights become overexposed. Step 3
Select the layer mask of the Levels adjustment layer. To do this, click on the thumbnail of the layer mask in the Layers pallet. The thumbnail of the layer mask should have a white outline when selected.Step 4
Open the Apply Image tool (Image> Apply Image) and apply these settings:Layer: Background Channel: RGB Invert: Checked Blending: Multiply or Normal (both do the same thing) Opacity: 100%
Step 5
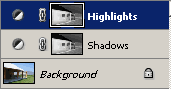
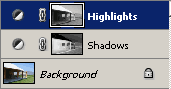
The layer mask thumbnail should look like an inverted monochrome version of the picture. This layer corrects the shadows so we'll rename the layer to Shadows. Fixing the Highlights
Now we'll work on fixing the highlights.Step 6
Duplicate the current layer and rename it to Highlights. We will now work on correcting the exposure of the highlights. Step 7
Select the layer mask of the Highlights Levels adjustment layer. Press Ctrl+I to invert. Step 8
Double click on the Levels icon in the Highlights layer to open the Levels tool. In the Levels tool, adjust the middle input slider so that the highlights are properly exposed. Restoring Contrast & Saturation
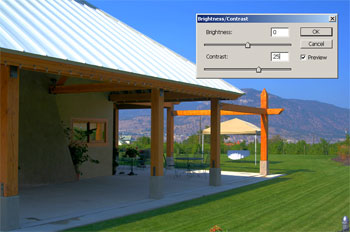
As a result of this technique, the contrast has been reduced and saturation has been increased. Below are optional steps to restoring the original contrast and saturation.Step 9
The photo should now show more detail than the original. However, you'll notice that the contrast has been reduced as a result of this technique. To fix this, simply create a new Brightness/Contrast adjustment layer (Layer> New Adjustment Layer> Brightness/Contrast) and increase the contrast. Make sure that this layer is the top layer. Step 10
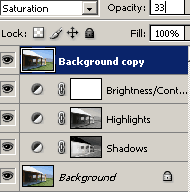
Duplicate (Ctrl+J) the Background layer and move it to the top in the Layers pallet. Change the blending mode to Saturation and adjust the opacity to adjust the strength of this layer. Final Results
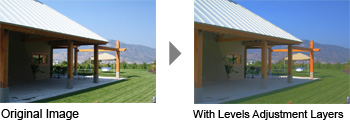
Before and After
Rollover the image below to see the before and after effect.Shadows/Highlights tool vs. Faux Dynamic Range Increase
Rollover the image below to see the difference between the two techniques. The Shadow/Highlights tool produces lower quality results with halos between high contrast edges.
source: photoshoptutorials.ws
0 comments:
Post a Comment